In this post I want to talk to you about insulation (and air/vapour barriers). This is perhaps the most important information you will get from me in this series regarding sustainable design and construction. And it won’t be because of type or methodology. It will be because of the AMOUNT.
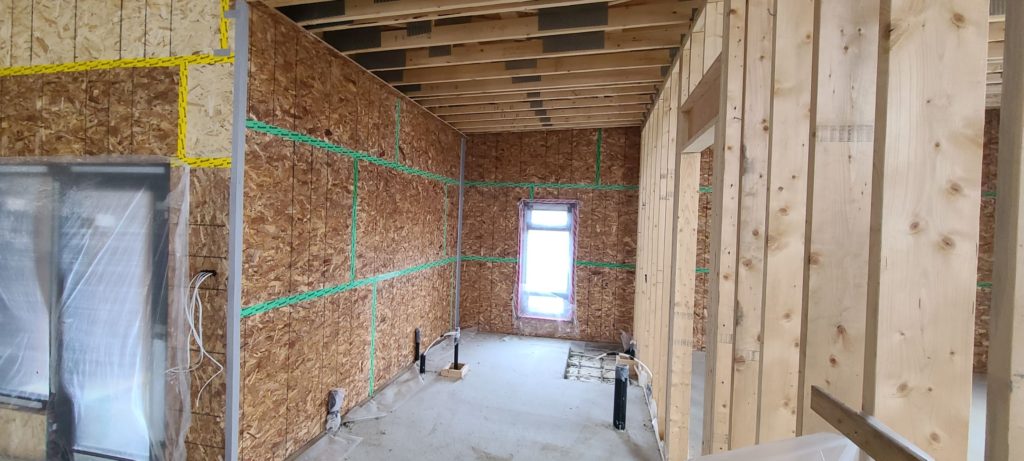
I used Passive House guidelines for insulation levels in Climate Zone 6 (where I am). As you already know, the foundations and floor slab have been insulated quite significantly with R34 and R25 respectively using Expanded Polystyrene. Now that the shell is up and weather-enclosed, it’s time to insulate the walls and roof decks.
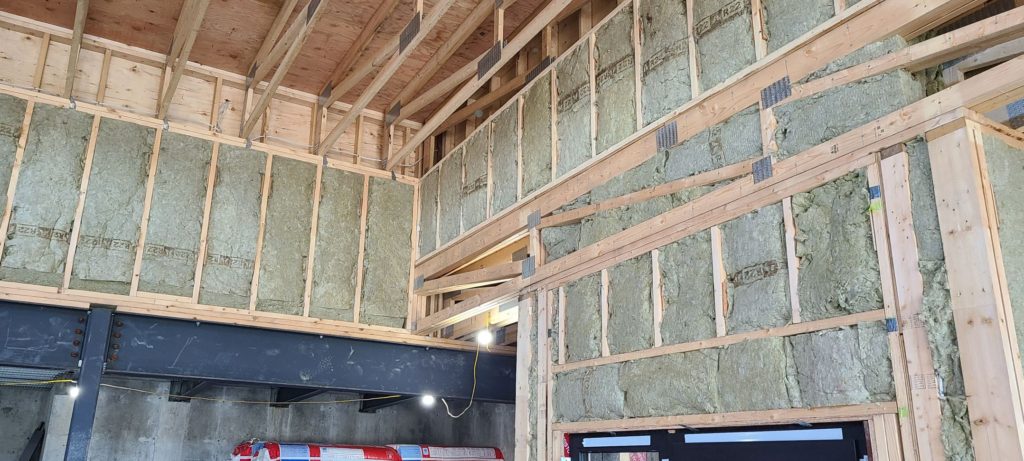
You may recall that the exterior walls are made up by using modified Larsen truss assemblies instead of studs – the result of which is an interior cavity of almost 13 inches. It has been specifically designed for the combined depth of standard thicknesses of mineral wool fibre insulation for a total R value of 50. (We used two layers of R14 in combination with one layer of R22.) Mineral wool is my “go-to” product for wall insulation. It is made from an infinitely renewable resource: rock slag. It also sheds moisture as opposed to absorbing it. My crew are all set to start cutting and fitting.
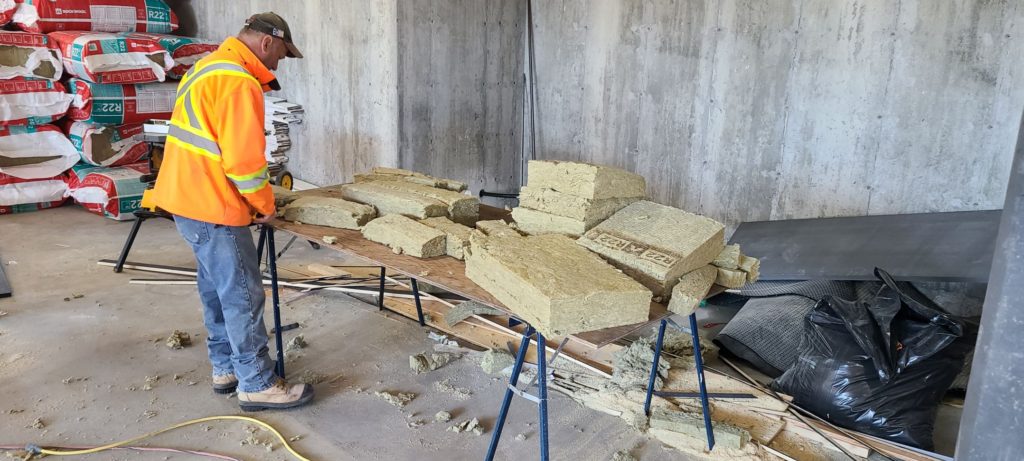
Given that the wall cavity is divided into standard widths (centre-to-centre) and there is no issue with having to thread the insulation through any voids in the wall (due to the extruded polystyrene thermal spacer integral to the wall truss) the installation goes very rapidly. It is completed in less than three days by a two-man crew. They have been extremely fastidious in cutting the insulation to fit snugly.
The top left photo also shows a complete Larsen truss (plates removed). It clearly shows the extruded polystyrene thermal spacer referenced above.
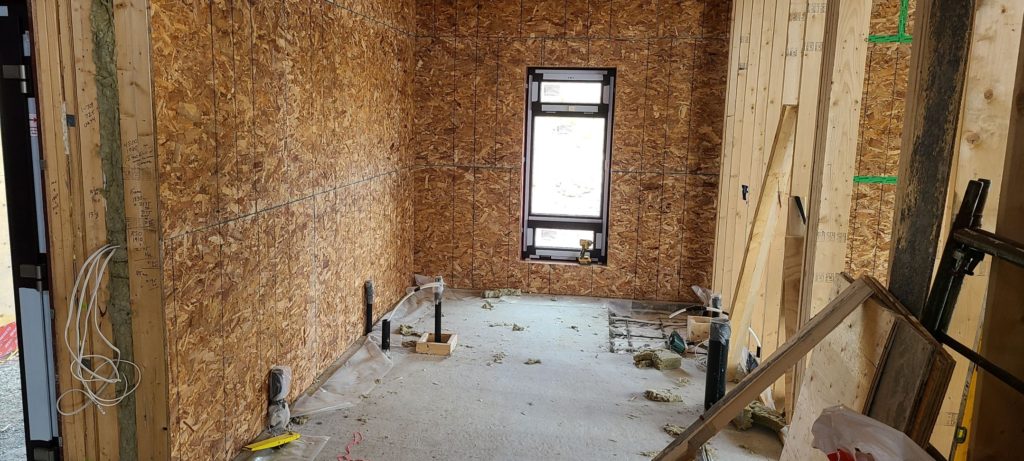
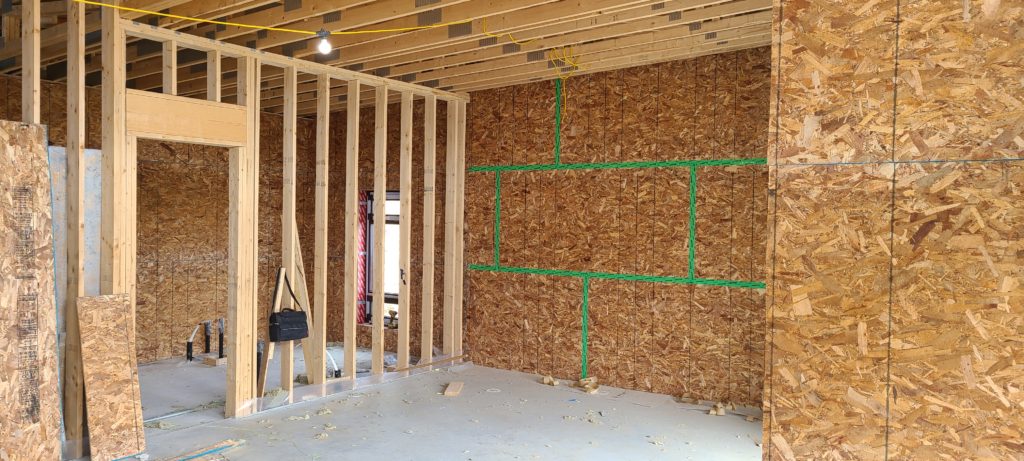
We used plywood as an exterior sheathing and covered it with a self-adhesive weather barrier (RevealShield©). As with most sustainable houses, we have chosen to use oriented stand board (OSB) as the interior sheathing. Once sealed, it will be a very effective and forgiving (combined) air and vapour barrier.
The departure here, as many of you will readily see, is that sheet polyethylene is not being used. Not at all. The 16 mm thick OSB we are using is rated as a Class II vapour barrier (0.1 to 1.0 perms) and will be effective in keeping interior moisture out of the cavity. By contrast, plywood is very permeable at 30 perms, which means that any moisture that may occur in the wall cavity stands a very good chance of drying out from the exterior. Plus, the rainscreen principles we have applied for the cladding installation will minimize moisture issues.
Once OSB has been installed on the inside of all the exterior walls, the seams are carefully taped with a high quality, low-perm tape. We are using Fentrum tape for corners and Rissan tape for flat seams. Both tapes are from Siga, a company that has set a new standard for construction air sealing.
The air/vapour barrier will be continuous at the floor intersection by securing the polyethylene sheet damp-proof membrane from under the slab, up the wall about six inches and sealing it to the OSB by stapling it through a liberal, double bead of acoustic sealant.

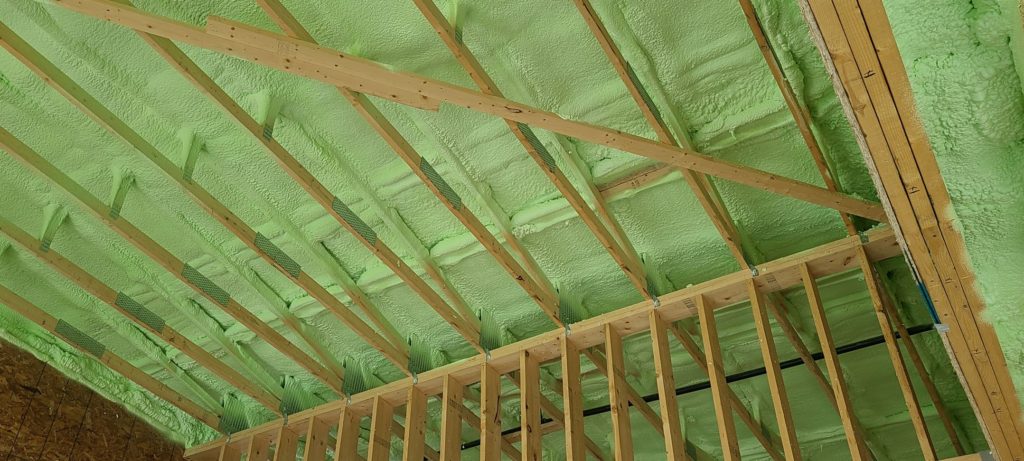
With the OSB completed, the insulation of the roof decks can proceed. We have chosen a spray application of closed cell polyurethane foam which offers excellent thermal values and is also classified as an air/vapour barrier. The EcoFoam product generates no waste and the blowing agent for the product is CFC free – meaning such applications are no longer ozone depleting.
We require a minimum of twelve inches of foam thickness to achieve our minimum target of R80. This will require four separate passes as there are limitations on application thickness and each must cure for approximately 24 hours.
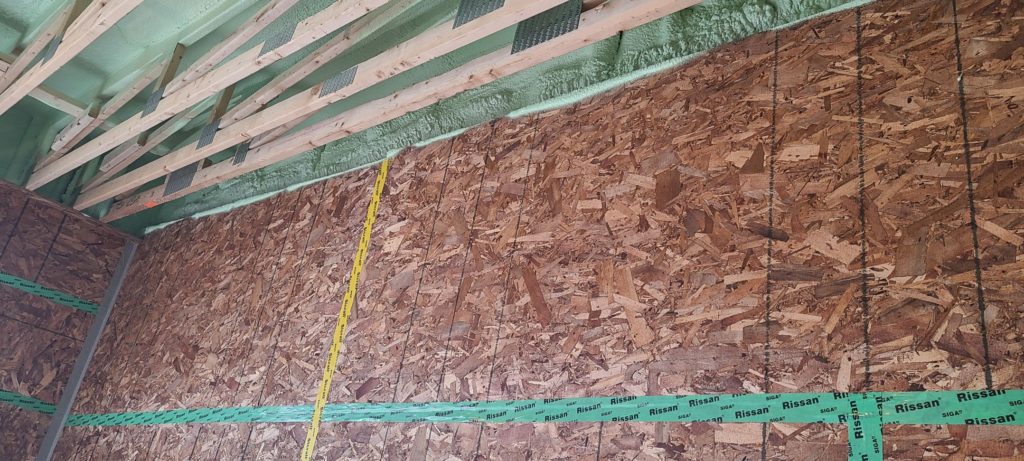
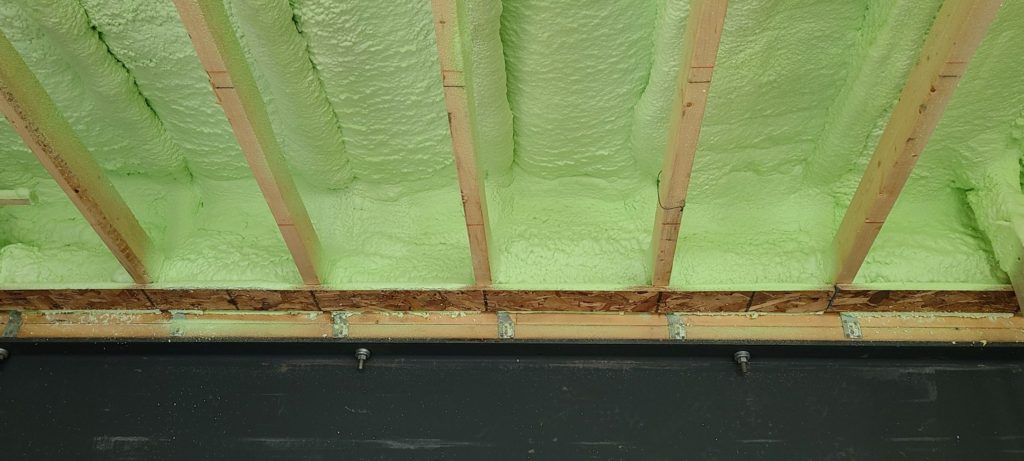
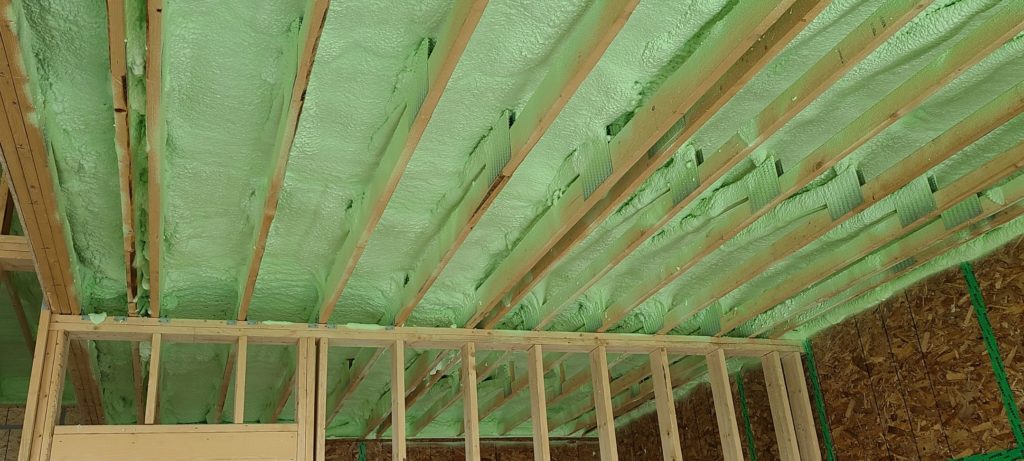
It was critical that the foam application also extended down the exterior walls to engage the OSB. In this manner, continuity of air/vapour barrier (as well as insulation) is achieved at the roof/wall intersection. As can be noted on the photos, our 22” deep roof trusses are over half buried in the foam. The bottom chord of the truss remains free however, to accept strapping for the ceiling finish.
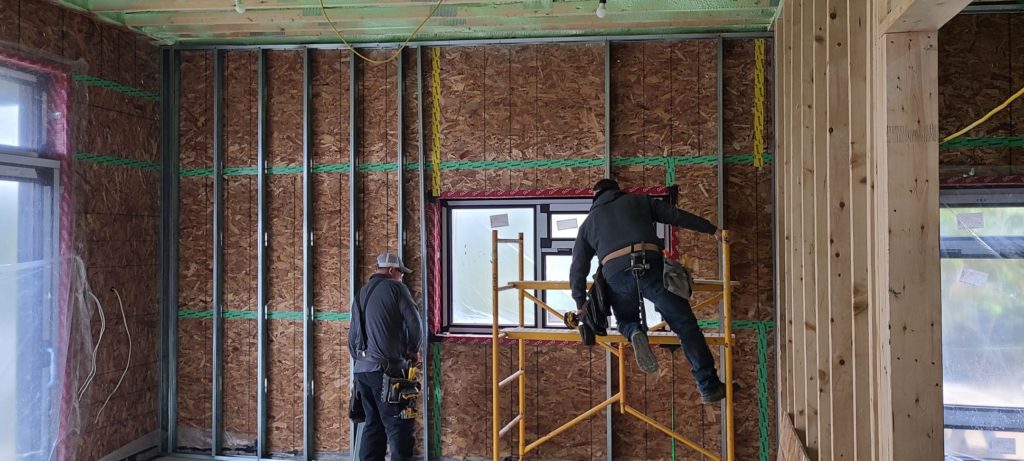
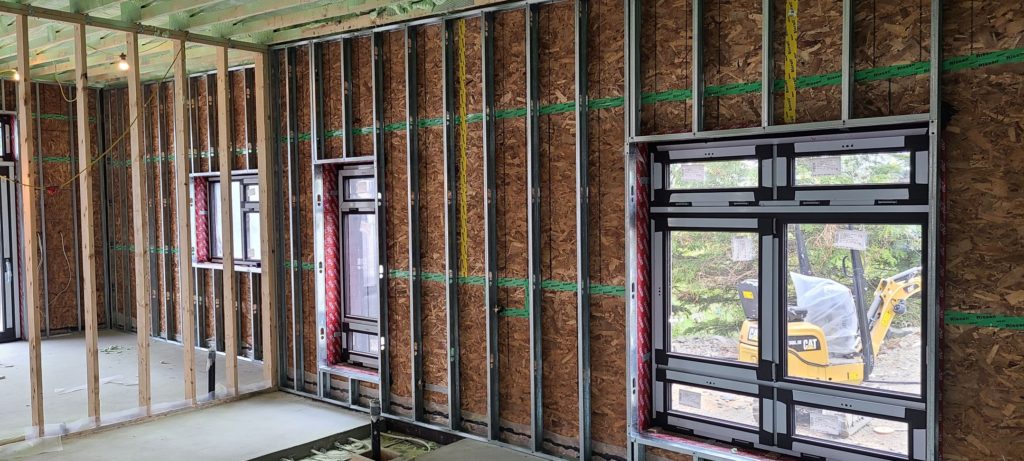
Now comes the eccentric part. I am adamant that the air/vapour barrier be unbroken (like the circle in a famous Johnny Cash tune). Penetrations of the OSB are not permitted, meaning that all wiring, plumbing and related fixtures and controls will be housed in a “chase wall” constructed inside the OSB. This will hopefully lead to an extremely airtight solution.
The exterior walls are all being furred out on the inside with light gauge metal studs. This cavity will house all the services that are required to be on the perimeter including outlets, switches, thermostats, and so forth. The metal studs will be finished with gypsum board and there will be no issues with cutting or sealing around plastic sheet. The assembly will not be punctured and no drafts will be present (hopefully).
Below are pictures of the “chase wall”. It is the ultimate step to ensure air and vapour tight construction. Once completed, mechanical and electrical rough-in can begin and we can also move on to interior partitions.
In order to determine how effective the design and construction is, AeroBarrier Canada will shortly be conducting testing and additional sealing of the envelope. The following explanation is taken from the Transfer Energy website (the local AeroBarrier representatives):
“AeroBarrier is an interior applied air sealing system that seals building envelope leaks up to 1/2″. The waterborne sealant is aerosolized and injected into a pressurized home. The sealant is self-guided to the edges of visible and invisible leaks to create a seal by accumulating across the leak surface. The sealant is applied within 60-90 minutes and dries quickly, before system cleanup is complete.“
I am rather excited about employing this new technology and will report on how much we manage to improve the airtightness of the house in a future post. I do hope our air change rate is already extremely low already, but we shall see…
Hello Jim. Excellent post. I’m excited to see your AeroBarrier results. We recently had our new house sealed with it and are delighted with it. At the moment we’re apparently the “tightest house in Newfoundland”. But I’m willing to bet that yours will surpass ours given the amazing level of detail and care you’ve employed! Cheers, Shelley
There are many consultants around here who have said that I am so tight that I have the first dollar I ever made!
But seriously, I am a little concerned about the interface between the top of concrete wall and the steel deck. Not sure we have that sorted as yet. Shouldn’t be a problem when that part of the house is buried!
I’m here for the photos! Looking great!
Very interesting Jim, as my experience is with current but clearly outdated technology
Thanks Terry. I am trying to change the general concept of “current”. It takes time. In the mid 60s, contractors in Newfoundland were still rejecting roof truss technology. They never believed it would replace rafters and ceiling joists!