
This post about slab-on-grade installation will followed up with a discussion about watching paint dry.
Kidding!
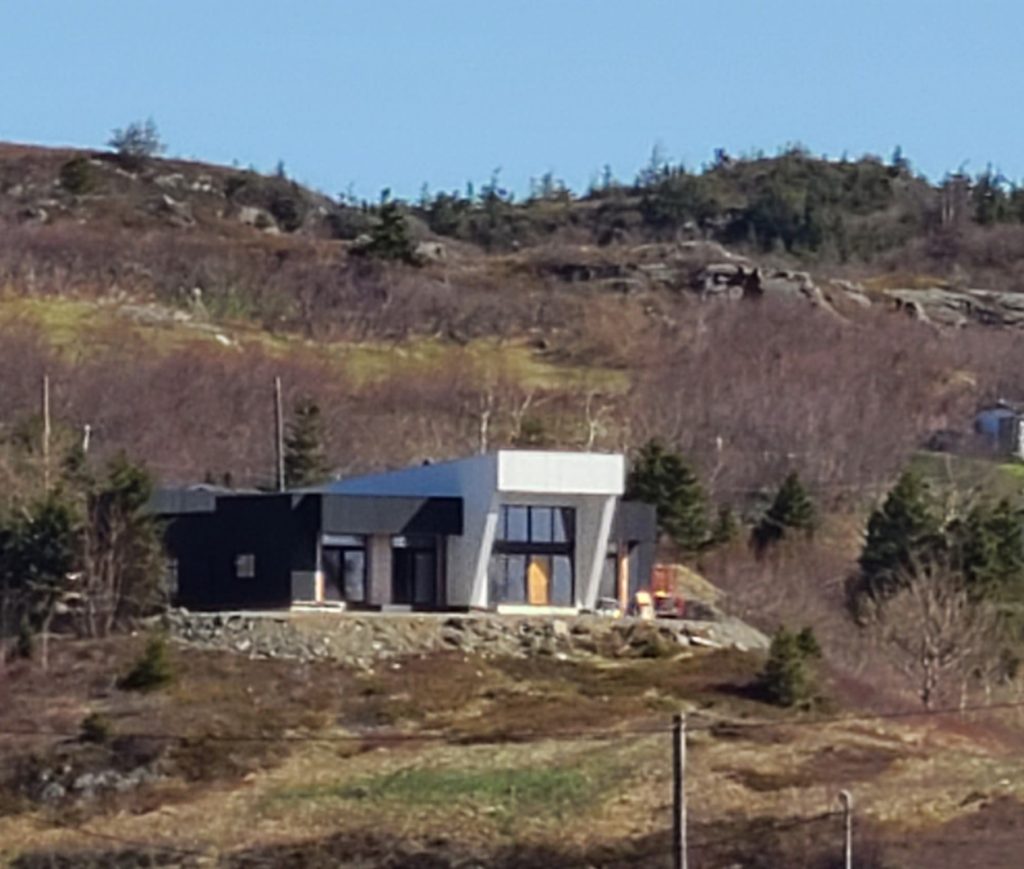
Somehow, a great number of my followers find all this to be a rather fascinating glimpse into construction processes that they are familiar with but have never witnessed in detail. So here we go on a little excursion that I do not hesitate to describe as potentially nightmarish if not for quality tradespeople who know what they’re doing!
To begin, I prepared a detailed pre-installation checklist for the contractor to make sure we had all the various underslab items covered off. It’s extremely difficult to fix a mistake or add in something after the fact. Plumbing and electrical items are reiterated. We also have a few quirky things that we need to ensure, like electrical conduit to the kitchen island, sanitary drain for the dryer, floor-mounted faucets for the bathtub, condensate drain for the Energy Recovery unit, etc.
I recommend a pre-installation meeting to make sure everything gets caught. This is even more critical if you include heated slabs: a hydronic system that requires pex piping to be buried in the concrete through which a heated medium will circulate.
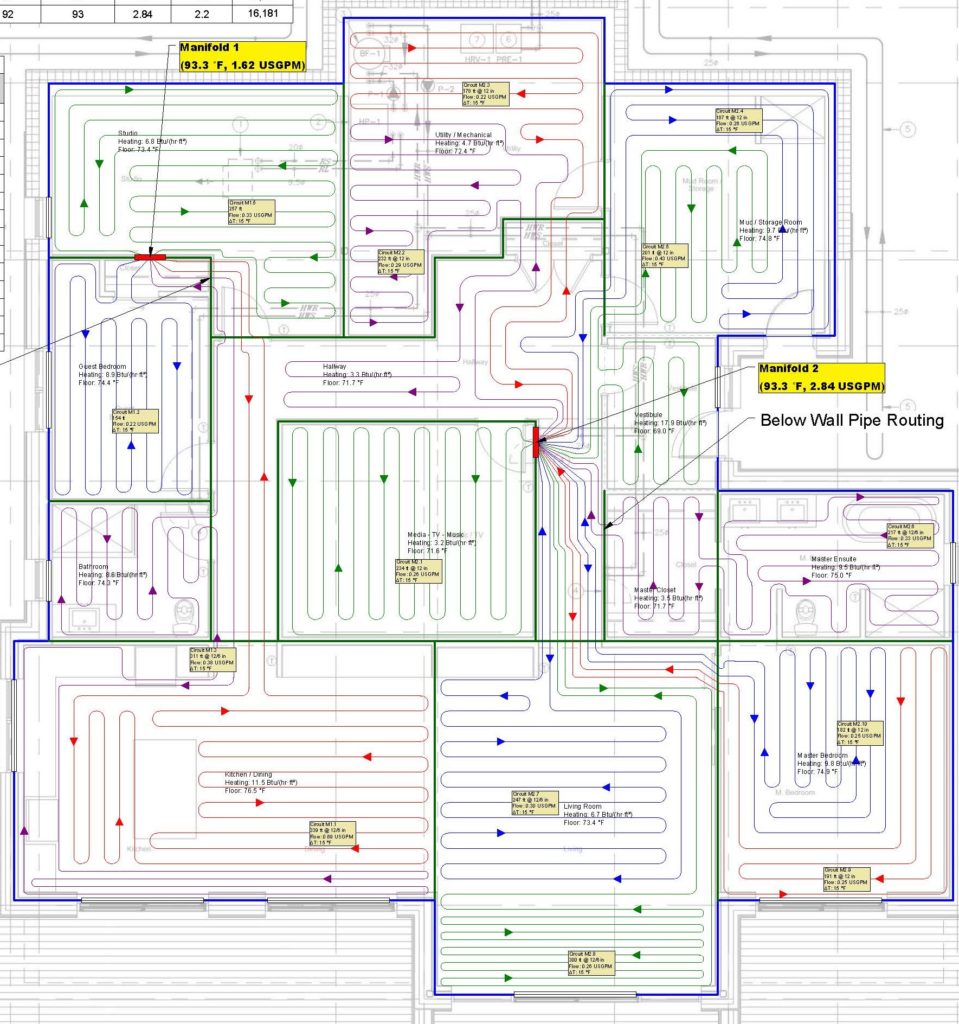
The pex piping headers have to be collected into groups (manifolds) that are connected to the main heating medium pipe. You may have one, two or even three manifolds depending on the size of your house, and they must be centralized to reduce pipe runs thereby making the system as efficient as possible.
The manifolds are concealed in metal cabinets so that they are always accessible for maintenance (which is minimal). So, you need to select out-of-the-way places (like in closets or behind doors) so they won’t be too obtrusive. Don’t rely on your mechanical contractor to select the locations. He or she (the latter in my case) will have a different appreciation of the term “obtrusive” (although I have to admit that manifold cabinets have gotten a little more tasteful in recent years).
Also talk to your mechanical contractor about the various heating zones and the efficiency of your house – the latter because a “typical” installation is overdone for extremely efficient homes. Heated slabs are, I admit, a little over-the-top for a sustainable house … but this is a discussion you can have with my wife, not me. There are simply places that you don’t want to go. This is one of them.
Here’s what my in-floor pex piping installation diagram looks like:
I digress. Time to get back to the main plot.
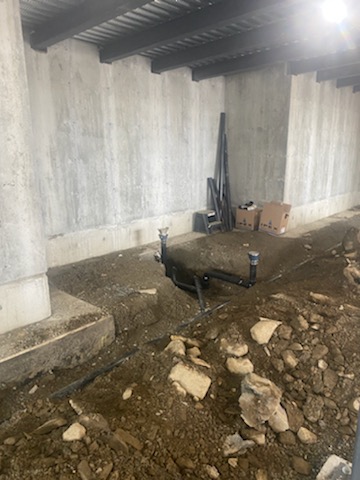
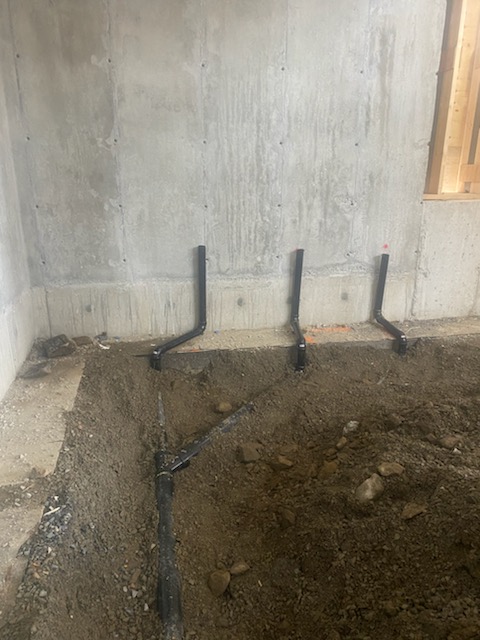
Even though the backfill has long been compacted for working purposes, the underground plumbing requires excavation of trenches for the sanitary services that all have to slope (according to the scatological proverb). Here’s how that goes:
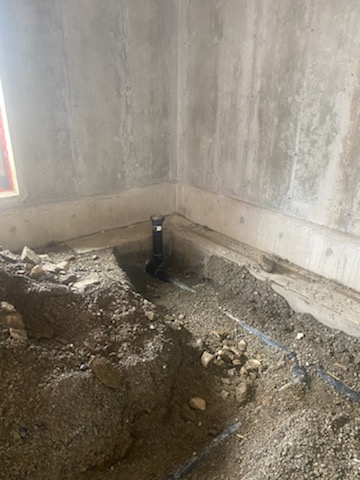
The trenches are then backfilled and compacted. The crushed stone or Class A gravel then gets topped up to make sure we have a minimum of six inches of compacted material at the appropriate grade. We can then proceed to install underslab insulation. This is to prevent the slab from heating the world beneath as opposed to the world above. (The ground below is a very effective heat sink which we want to short-circuit.) Because we are using Passive House guidelines for insulation levels, an R-25 or the equivalent of six inches of high density (Type 3) expanded polystyrene is being used.
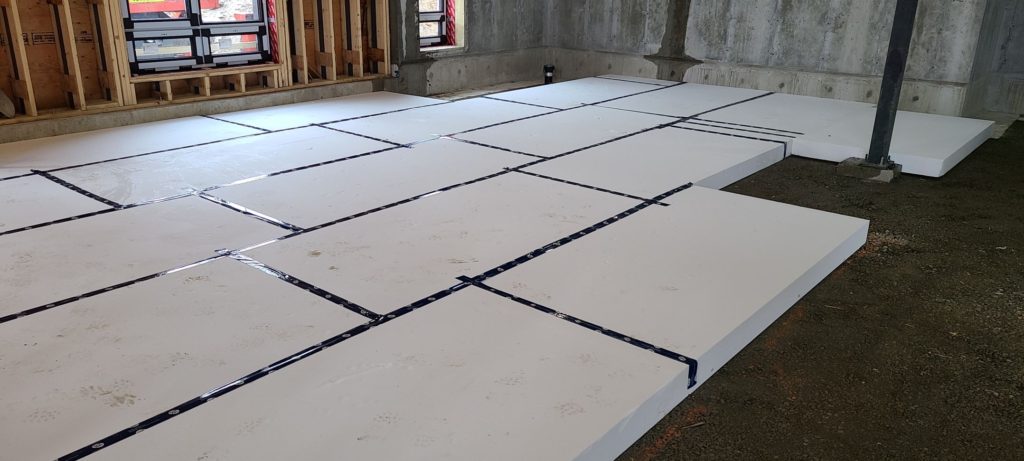
My super-keen crew taped all the insulation joints, which is not necessarily required as polyethelene sheet material will also be installed over the insulation. Technically, this is a damp-proof membrane, not a vapour barrier, but we will be carrying it up a foot onto the exterior walls to ensure air and vapour barrier continuity for the entire building envelope. The membrane is taped with special attention to any pipe and/or conduit penetrations.
Bitumen impregnated fibre board is used at the slab perimeters as a control joint. If there was no insulation on the exterior foundation walls (in this case there is) I would strongly recommend that this joint be comprised of a minimum 1-½” of extruded polystyrene to lessen the thermal bridge. Of course, I am not advocating the dismissal of exterior foundation insulation, but recognize that many owners will need to be budget conscious.
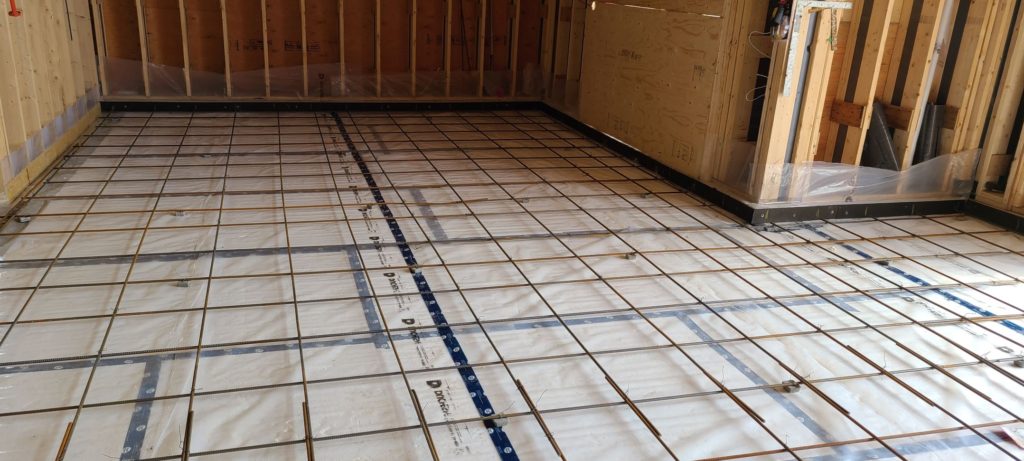
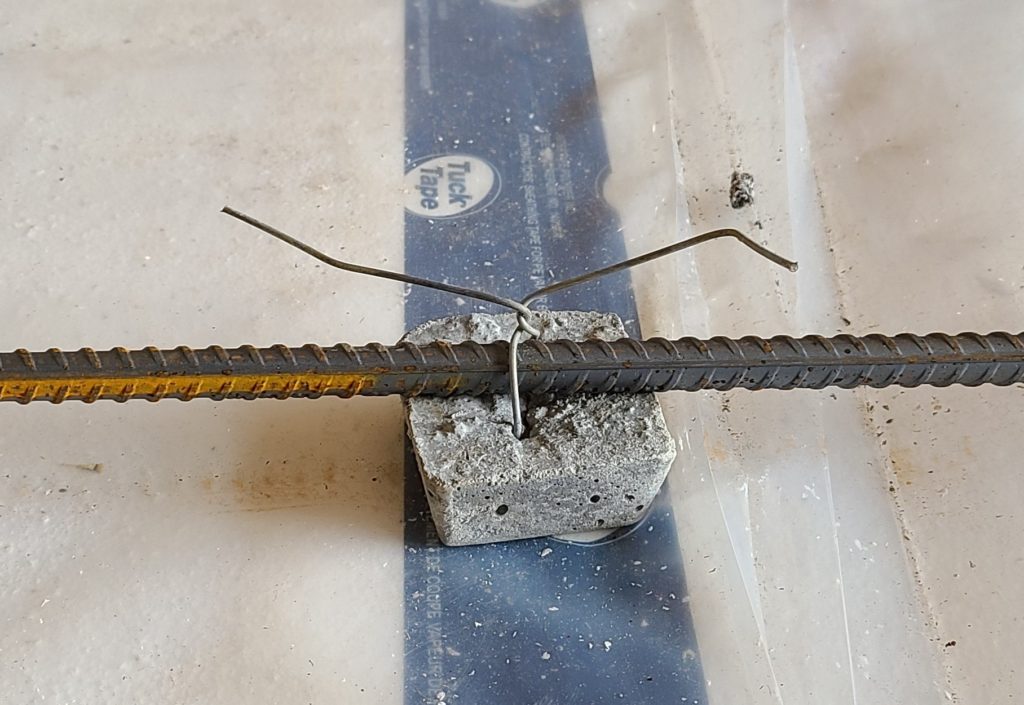
I had originally discussed two layers of welded wire mesh with my structural engineer – one below the pex and one above – but my experience has been that welded wire mesh is a major pain while casting a concrete slab as it is never suspended where you want/need it and is difficult to walk on. So, in discussion with my contractor, I opted for a 16” grid of 10M rebar. Rebar would provide a better means to install the pex piping where I wanted it (mid-way in the slab) and would be far easier to work with. The rebar was raised 1-½” above the insulation to be effective in controlling settlement and bending, leading to cracks. This is done with “chairs” – typically, purpose-made plastic cones or little pre-cast trapezoids of concrete with an integral attachment wire to keep them in place. I have the latter as you can see. Easily procured locally. The rebar installation was completed in one day and was not significantly costlier than the original mesh solution.
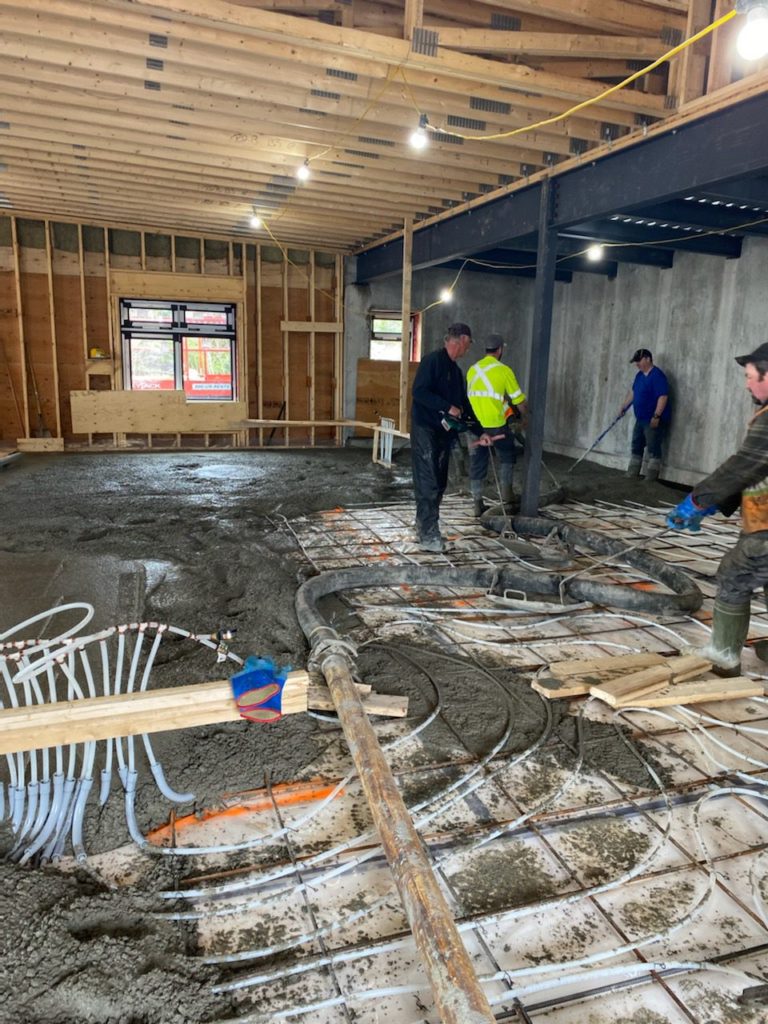
Next, came the pex piping. By now, it’s probably obvious to you how this is installed. A crew of three persons completed the task in just over two days. A simpler option is to install the pex with pins that are essentially pushed into the insulation – resulting in a damp-proof membrane that’s more like a sieve. This will be tempting from a cost/time perspective but hardly worth it from a sustainable point of view. Plus, pex suspended with the rebar will be where you want it – closer to your feet!
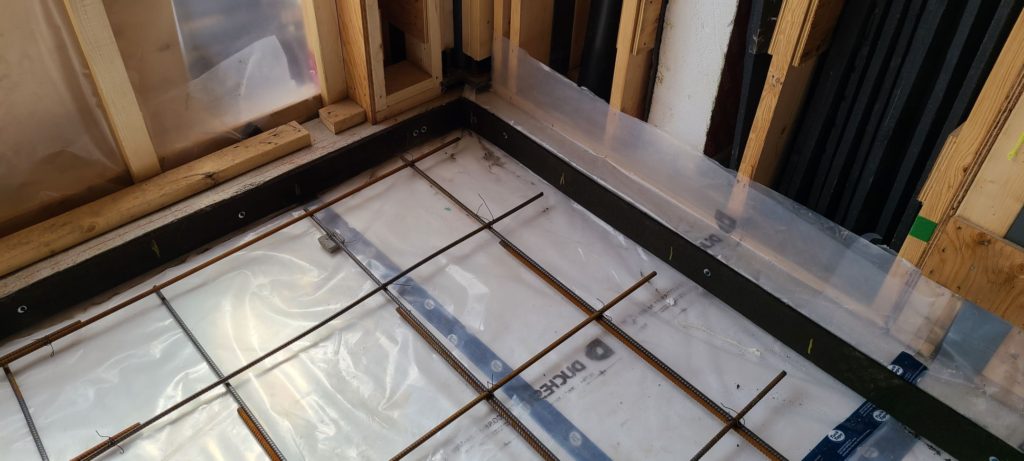
Your contractor will have to build one or two clever suspended frames to collect the pex manifolds. This is because you cannot build anything from the floor as it will hinder the concrete installation (to say the least). Also, please notice that curved conduit elbows are used to protect the piping runs where they come up from the floor and are collected into the manifolds. This is very wise and I believe is becoming standard practice.
The mechanical contractor will connect each pex line at this point and charge the manifold with compressed air. A temporary gauge installed at each manifold will immediately signal a pressure drop (from 100 PSI) if a pipe is ruptured prior to the completion of the slab. (One of the mechanical contractor’s crew is required to be onsite during the casting to monitor the pipe pressure. Should the worst happen, he is there to find the rupture and repair it while the work stops. It’s easy to find a rupture. There will be lots of bubbles. Yes. Oh … and all hell will break loose.)
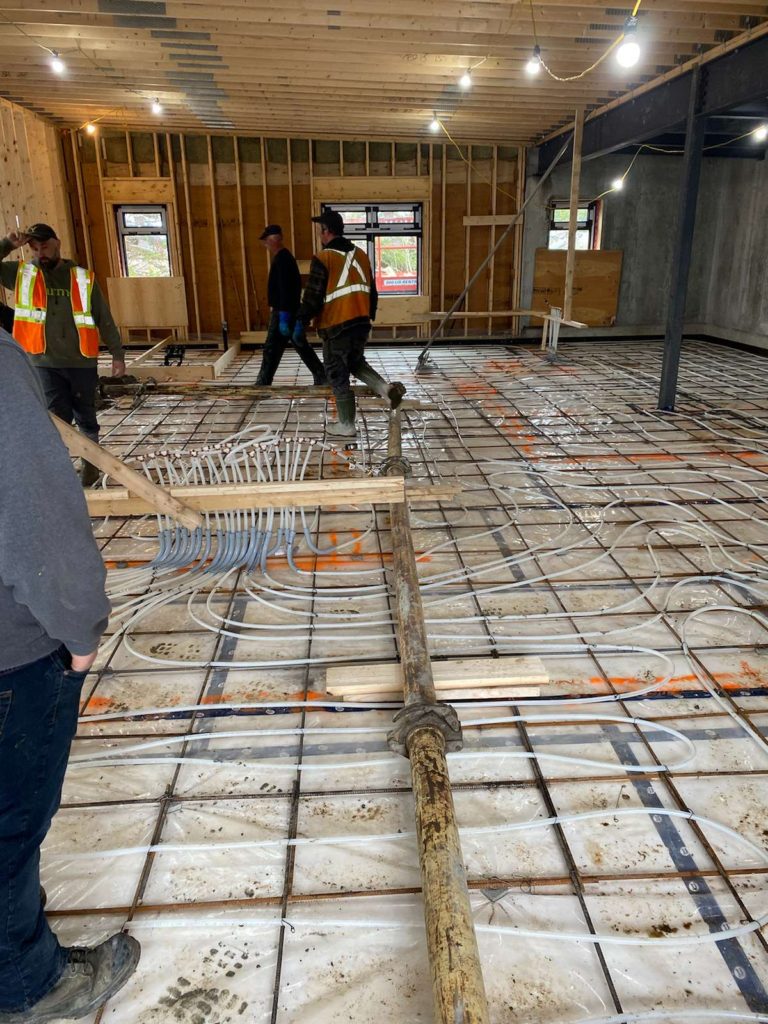
We are now ready to cast the concrete slab. This one will be a full five inches owing largely to the amount of crap we already have jammed in there. (A typical unheated basement slab could be as little as three inches thick.) The pipe you see in the picture (above right) is to pump the concrete into the ground floor level for the full 2800 square feet of building area. It is connected to a flexible hawser that can reach every corner. No wheel barrows here!
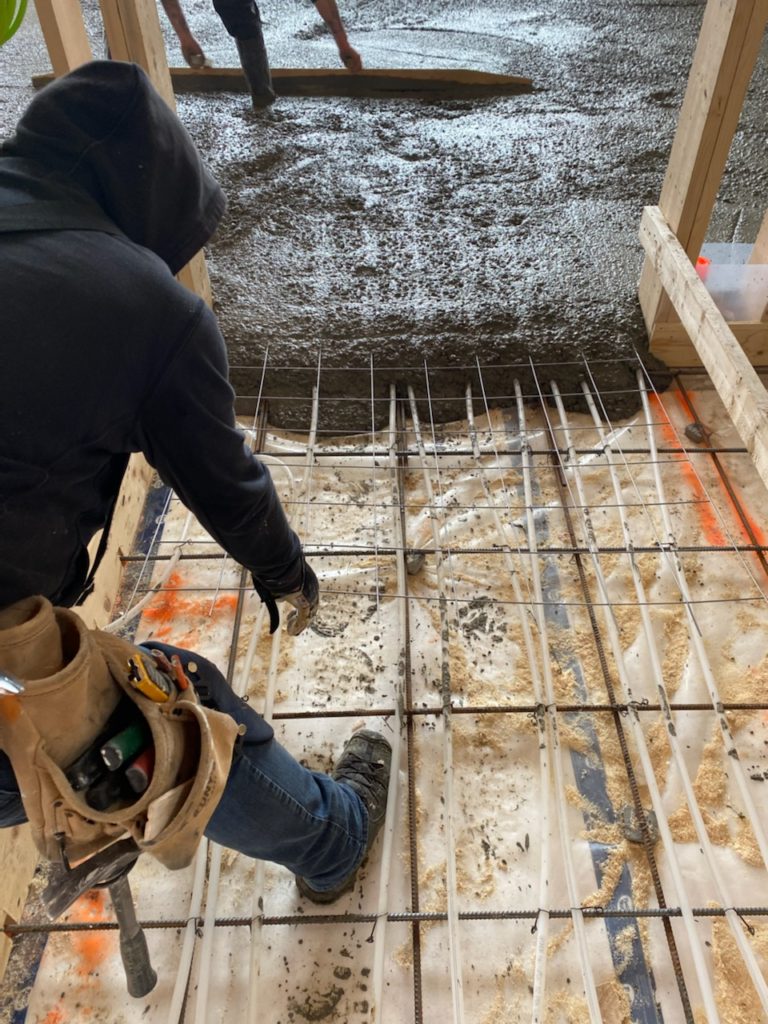
There are three locations (doors and corridors) where the slab continues from the main south slab to the north slab. They are separated because the loadbearing structural wall that has its own insulated footing, has been in place for some time – required to support the roof loads. I was concerned that any slab settlement may induce cracking at these locations, so I have asked my crew to make sure a section of welded wire mesh is placed in the upper concrete strata at these locations. In the picture below you can see one of my guys (Darth Vader) diligently carrying out my request.
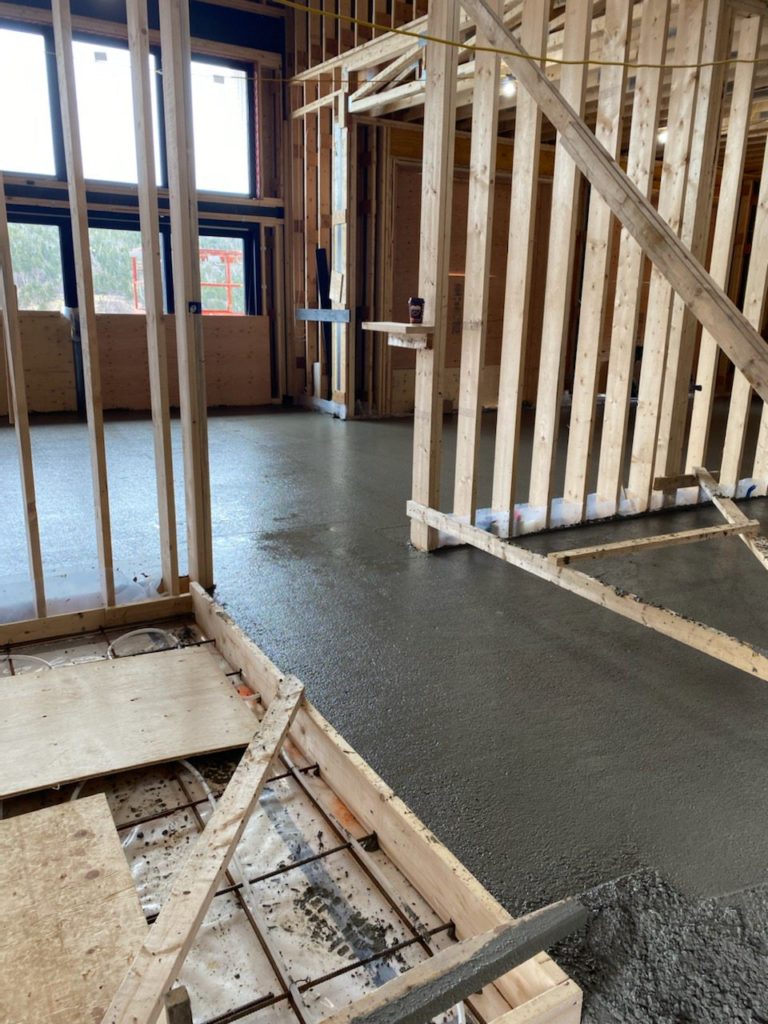
The second picture on the right shows the finished casting of the south slab. Here it is easy to distinguish the load bearing wall that separates the north and south slabs. Note that the foreground portion of the slab has been dammed. This is one of the two bathrooms. Because it will be finished with porcelain tile, it will be cast at a later date with a slightly lower elevation (to make up for the tile thickness).
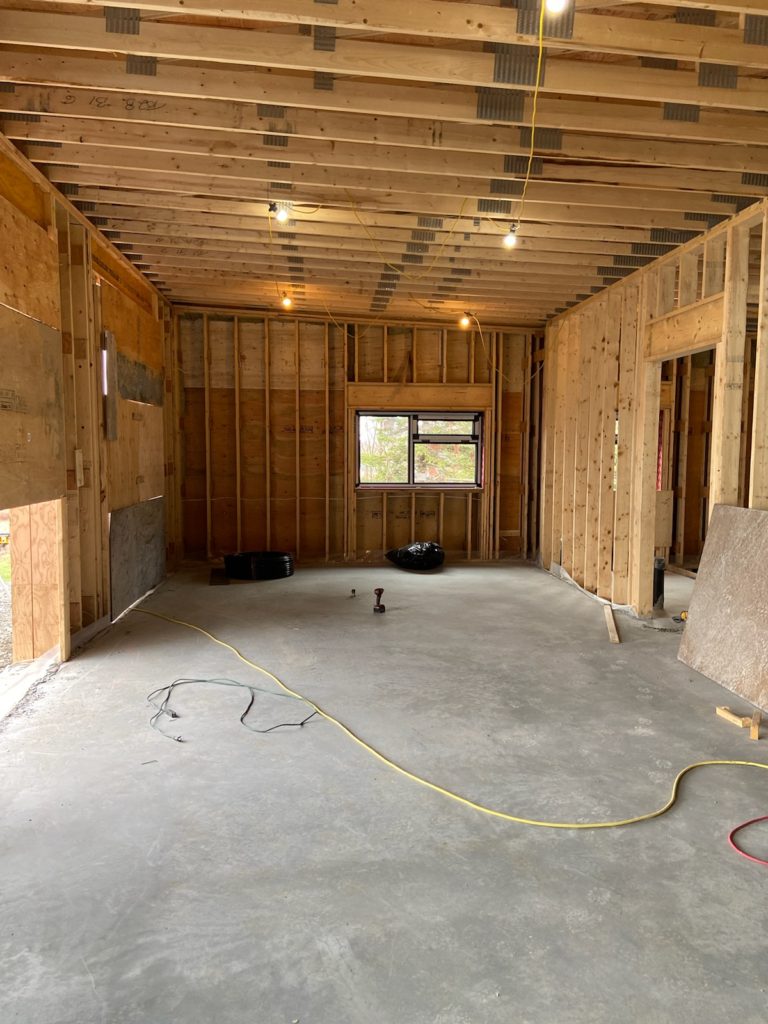
These final pictures show the casting of the north slab (flexible hawser is in evident use) and the finished south slab. The concrete slab took about five hours to complete. An early morning start is essential, as the concrete needs a few hours to cure before the finishers go in and steel trowel a smooth finish. They will be there for half the night as it is.
Overall, a great job was achieved by tradespeople who were extremely accomplished in their field and knew exactly what was required.
Hi Jim,
I have been following your build with great interest. I am very interested in the concept of sustainable housing, and also the discussions on carbon and concrete. I attach two links to articles I read in the past couple of days. I am assuming that slab on grade is much less concrete than pouring a full basement.
Keep up the interesting blog!
https://www.treehugger.com/embodied-carbon-iceberg-under-homes-buildings-5272392?utm_campaign=treehugger&utm_medium=email&utm_source=cn_nl&utm_content=27762232&utm_term=
Good points made by Treehugger! I too believe that we should not be building structures in which to park cars. As for myself, yes, I did eliminate the basement which saves about 40% (my estimate) of concrete required for a typical house. But I am a realist knowing that we cannot currently build without using concrete or plastic insulation (despite only using mineral wool insulation in the walls). Climate change demands that we roll up our sleeves and demand alternatives. Here is a link to an excellent article which offers hope in that direction!
https://www.constructioncanada.net/concrete-carbon-emissions-real-challenges-real-opportunities/4/
(In particular, I like the promise of recycling glass into ground pozzolans to significantly reduce cement content – the biggest problem – in concrete mixes.)
Thank you! About 6 years ago we built an outbuilding and we dug into the hillside, so it is at ground level on the front, but 8 feet into the bank. The walls were concrete, on the two sides and back, but it is sloped down. I didn’t know about the concrete/carbon issue at the time.