This post has been a long time coming. It tends to correlate rather well with my window and door saga. The Passive House Certified / triple glazed units took 22 weeks from order to delivery. Let this serve as fair warning. Almost a year later, and I am still missing parts required for the patio door installations. Patience required…

My windows and doors are aluminum reinforced poly-vinyl chloride (PVC-U). The “U” means the constituent material is unplasticized, which, in short, makes for superior weathering, enhanced ability to withstand thermal cycling, and greater overall strength. These windows are made in Germany.
Insert all manner of whining and aspersions here.
There are similar windows made in Canada, but none of the manufacturers I contacted (all in BC) were interested in shipping to Newfoundland/Labrador except for one manufacturer that made fibreglass units (by far my preferred) but my budget could not tolerate the 30% additional cost.
So, nimm mein geld deutschland, here we go.
I would first like to say that I come to the topic of windows (and doors) with some trepidation – for besides opting for the best units your budget can stand, you need to also be cognizant that there are no standard details for installation. Every wall condition is different. Getting windows air and water tight requires careful consideration of every installation variable, but I will try to share some of the basic principles that I have learned over the years.
We begin with the rough (stud) opening or RSO. These are prepared by your framing crew based on the RSO given by the window manufacturer. They will usually allow at least a half to three quarters of an inch clearance from the window frame on all sides. This will permit fitting, alignment and adjustment for plumb. Because my walls are essentially trusses, we decided to account for plywood in the opening as well. However, you’ll notice that we introduced a quarter inch gap to prevent thermal bridging. This could also be called “passive house anal retention” but my crew agreed to humour me! The gap occurs roughly in the middle of the window frame.
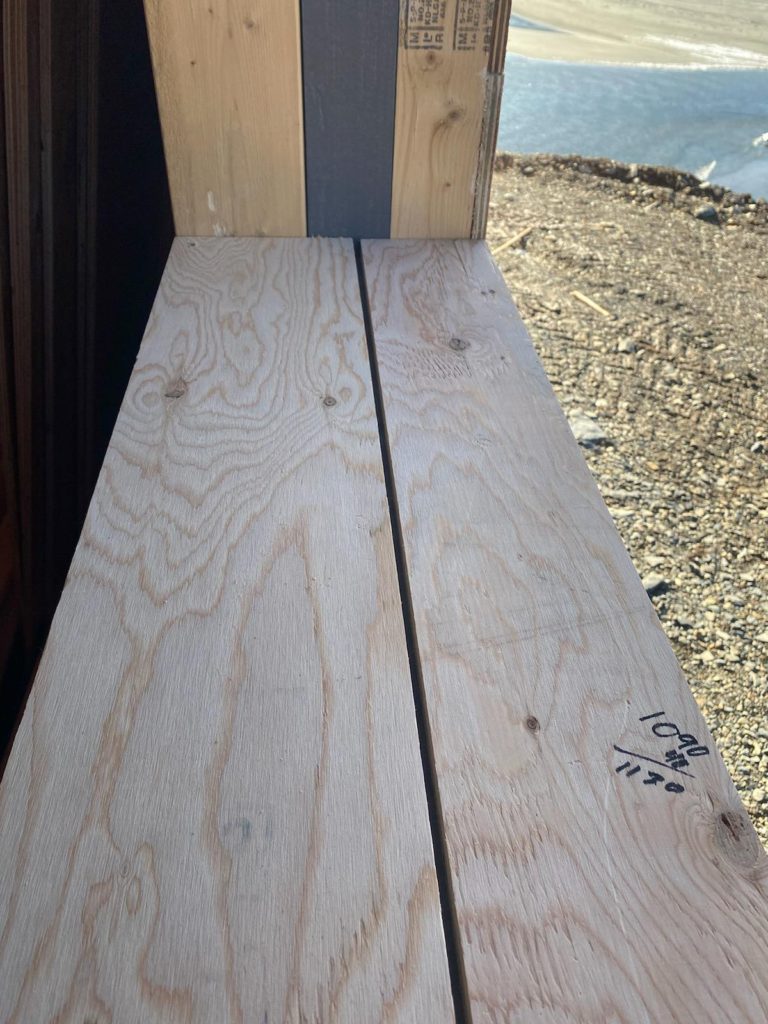
Each opening is then completely wrapped in an elastomeric/poly-faced membrane (typically Blueskin or, in this case, Resisto). This is to bridge the various components in the weather barrier and air barrier in order to make the systems as tight as possible.
Prior to installing any given unit, a strip of expandable ethafoam gasket is installed at the frame location. The ideal placement of the frame in any wall insures a continuous line with the insulation. Avoid the common mistake of locating window units outside of the wall insulation.
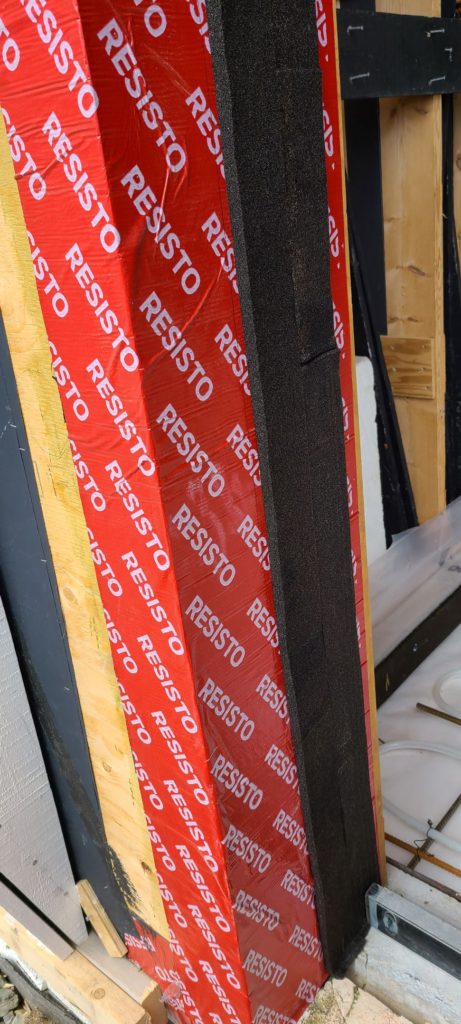
The ethafoam gasket comes off the roll at a ¼” thickness. It will slowly reach its ultimate depth (depending on the ambient temperature) of over one inch. I am personally opposed to spray foam sealing of windows after-the-fact, a common practice here which conveniently buries shoddy, unskilled workmanship. Urethanes can deteriorate over time. They are also good at trapping and holding water, leading to premature rot.
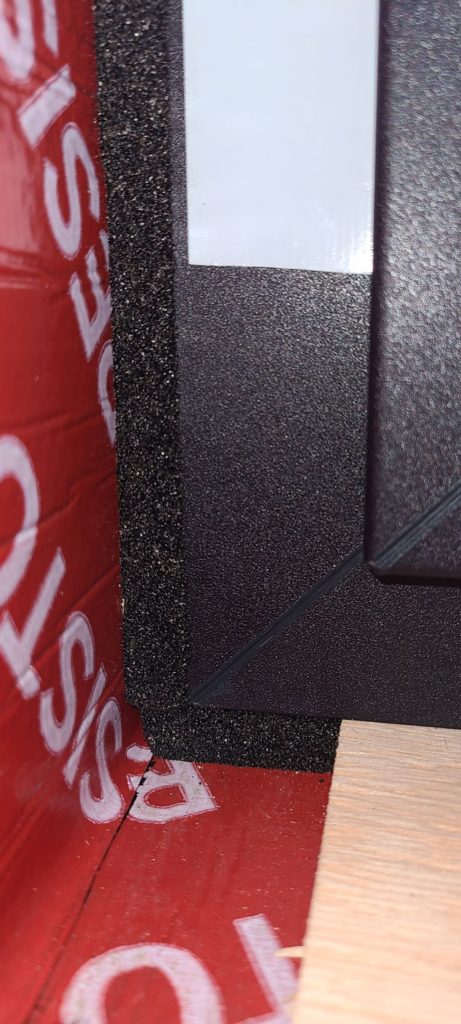
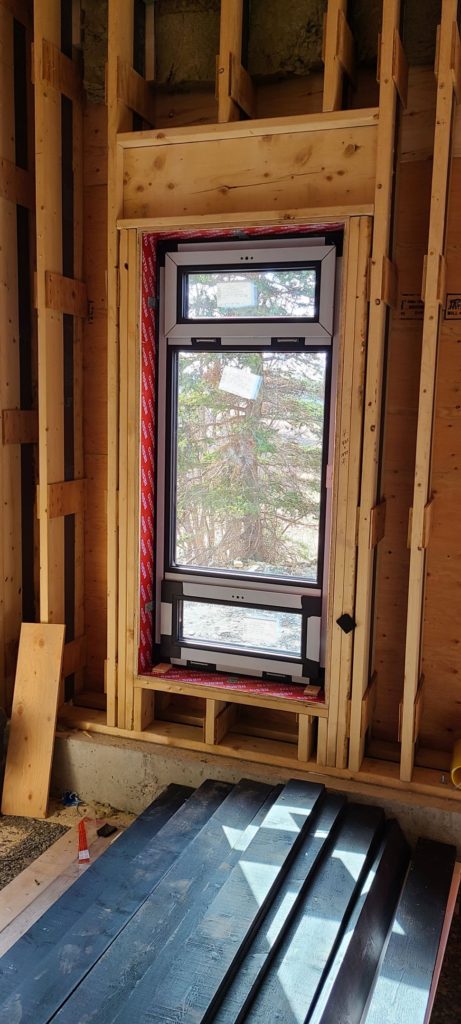
After the window unit is installed, the ethafoam will expand and seal the frame to the rough opening. Here is a picture of a corner where the gasket has been given time and sufficient heat to reach its ultimate thickness. (Note that the black pebble finish is that of the actual window frame. Some of the protective white shipping vinyl remains in place.)
And here is a unit installed. They are screw fastened using typical metal clips that secure to the frames and are affixed to the interior side of the RSO.
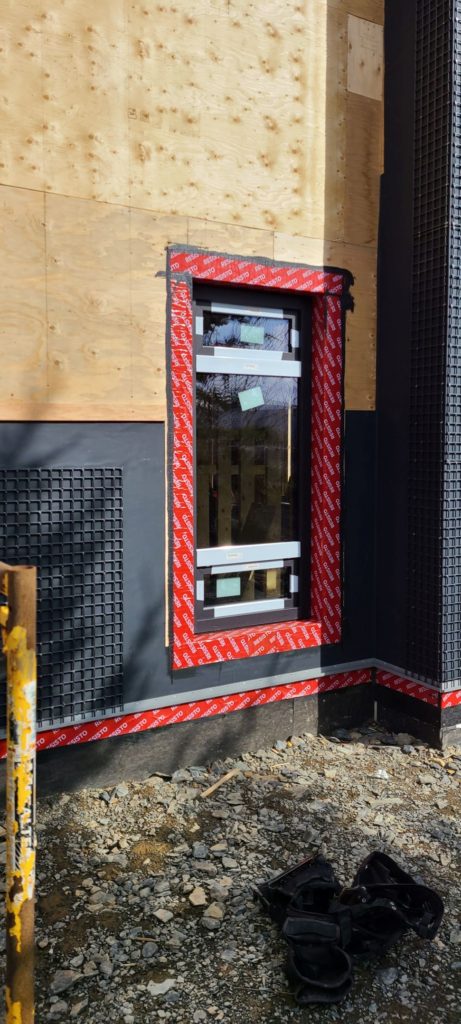
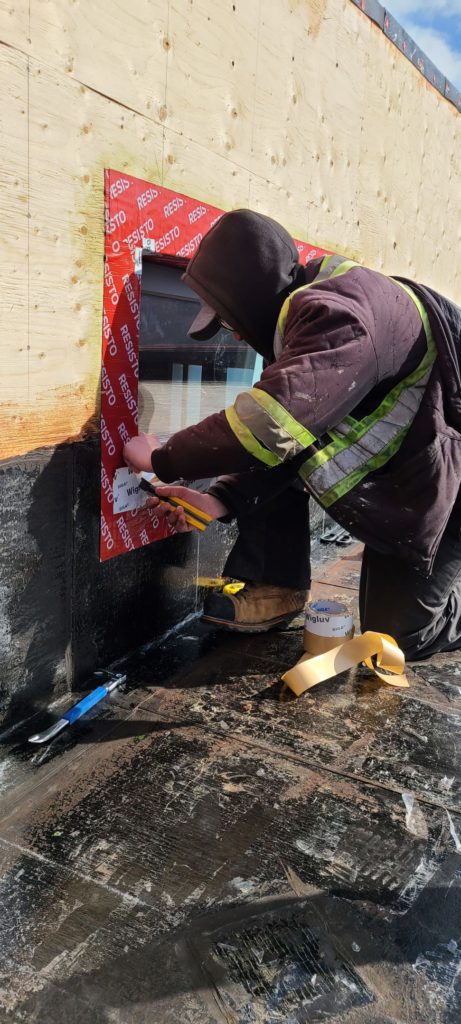
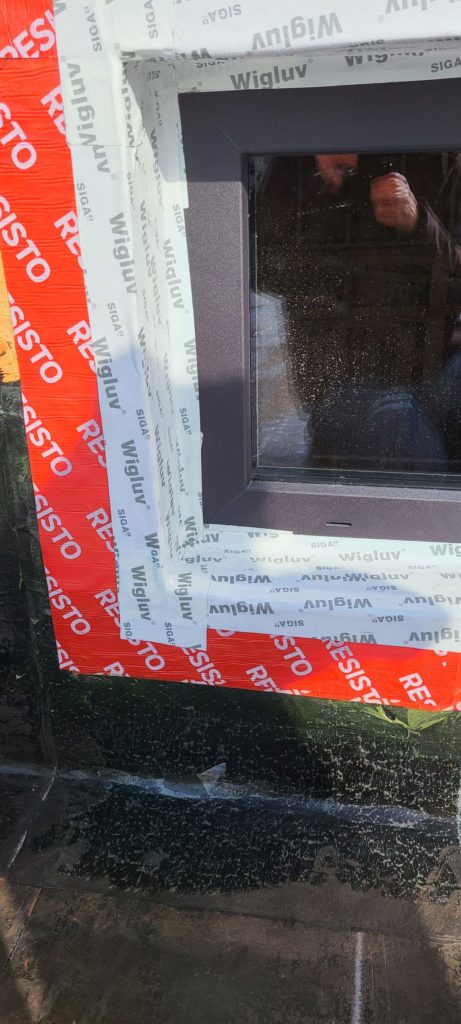
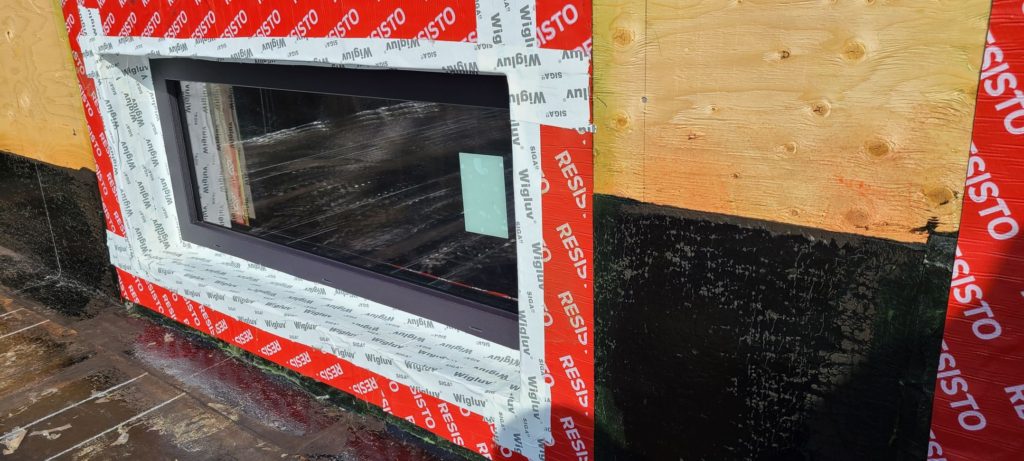
An installer uses a special exterior tape to insure air/weather barrier continuity between the Resisto flexible flashing material and the PCV-U frame. The “Wigluv” tape by Siga is a remarkable new (European) product that will tear off plywood veneer if you attempt to remove it. It is locally revered for its ability to “stick like shit to a wool blanket”.
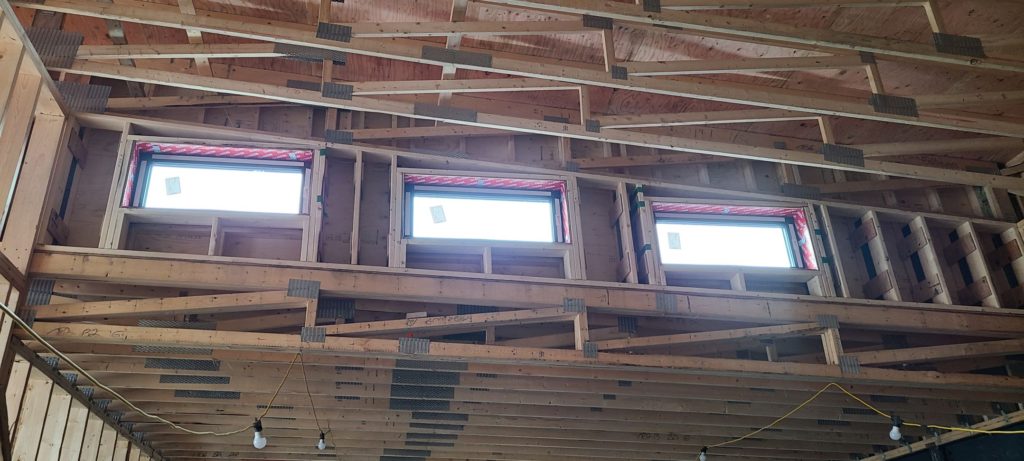
Here is another interior shot of the installation. Again, please note that the white you see is a removeable protective vinyl for shipping and handling purposes. The picture shows the three clerestory windows at the high/low roof condition on the west side. These will provide natural light to some of the interior spaces.
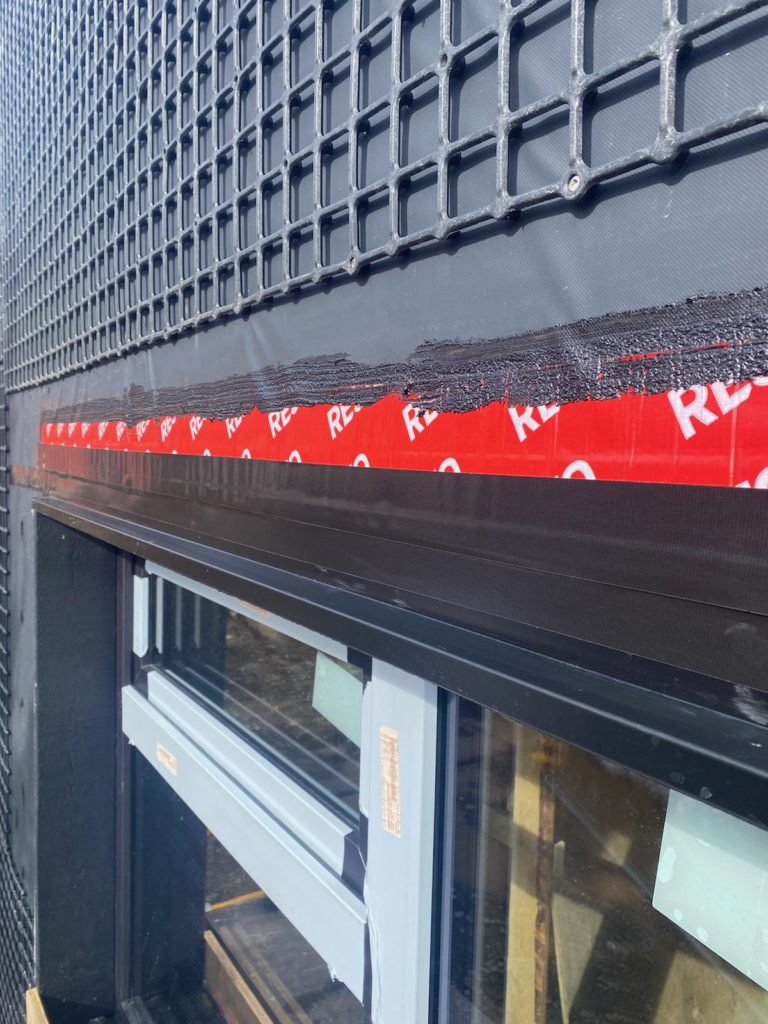
The head of each window opening is provided with a brake-formed metal drip trim that will shed water occurring on and behind the siding away from the window opening. It too is sealed against the flexible (Resisto) membrane before the VentGrid (shown above) and siding are completed. Continuity back to the (black / continuous) weather barrier is achieved by a liberal dose of sealant.
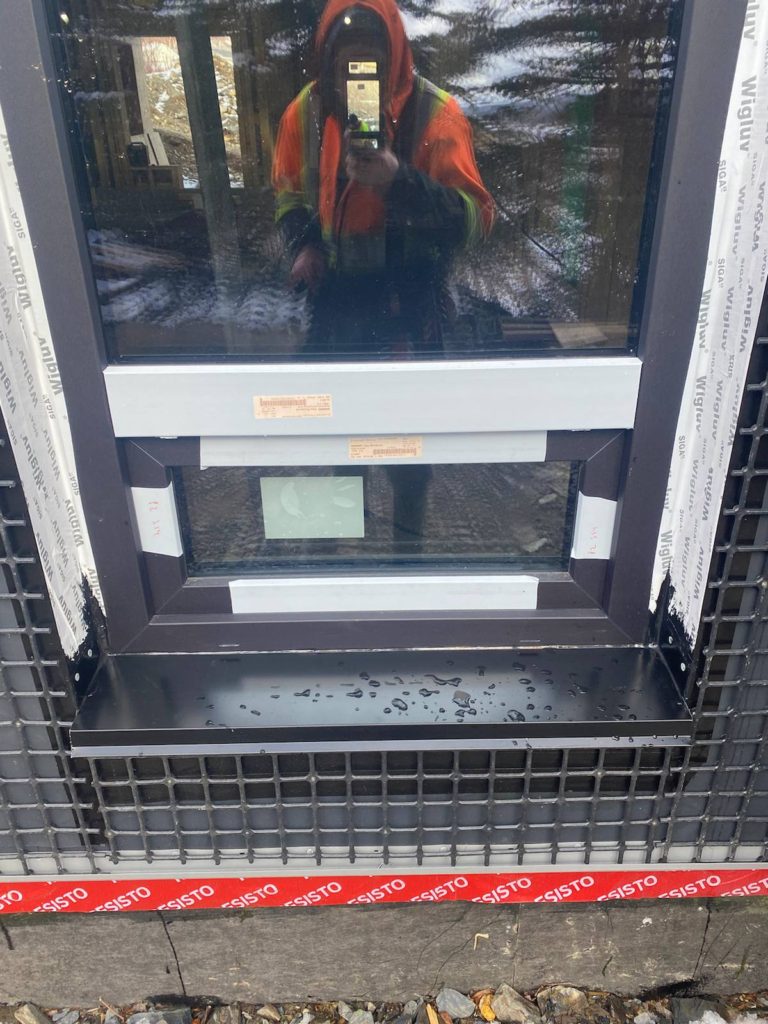
Similarly, a brake-formed metal drip trim has been fabricated specifically to suit the window sill condition. It is comprised of 22 gauge (prefinished black) sheet metal. Wooden wedges have been installed on the rough sill, and a sloped plywood sub-base has been secured over the wedges. The metal sill is glued (full bed of LePage’s PL construction adhesive) to the plywood and turned up two inches at either side for complete protection at the jambs. The metal sill is also sealed to the PVC-U frame.
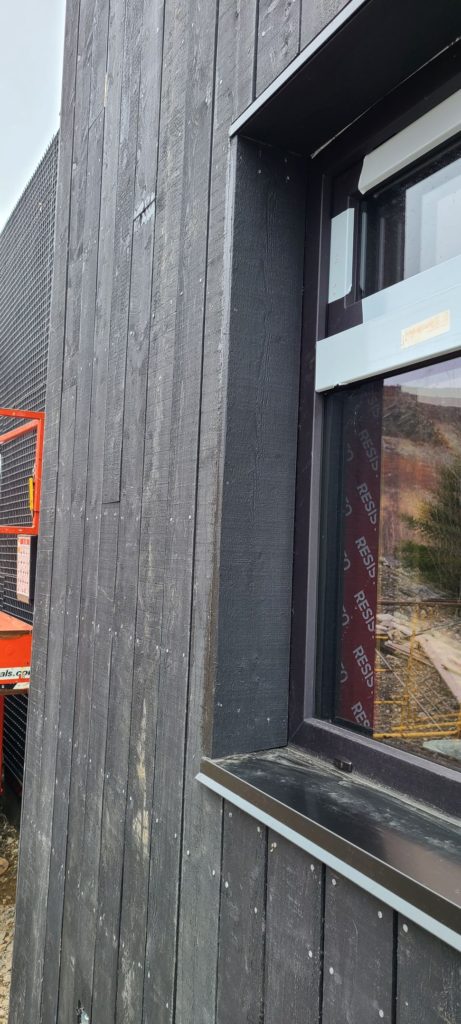
Our local spruce siding finishes each opening at the jambs and head of the opening. After these have been sealed, we have effectively created triple weatherproofing redundancy at all four sides.
There is a large, four-panel window unit above the sliding doors in the main living area – facing south – of course. There are also three patio doors (kitchen, dining room and master bedroom) each with a glass transom panel above. Unfortunately, I cannot show you these yet until someone figures out where the special pieces that mate the upper windows to lower doors are. It’s a trans-Atlantic crossing. Somewhere near the Titanic I expect.
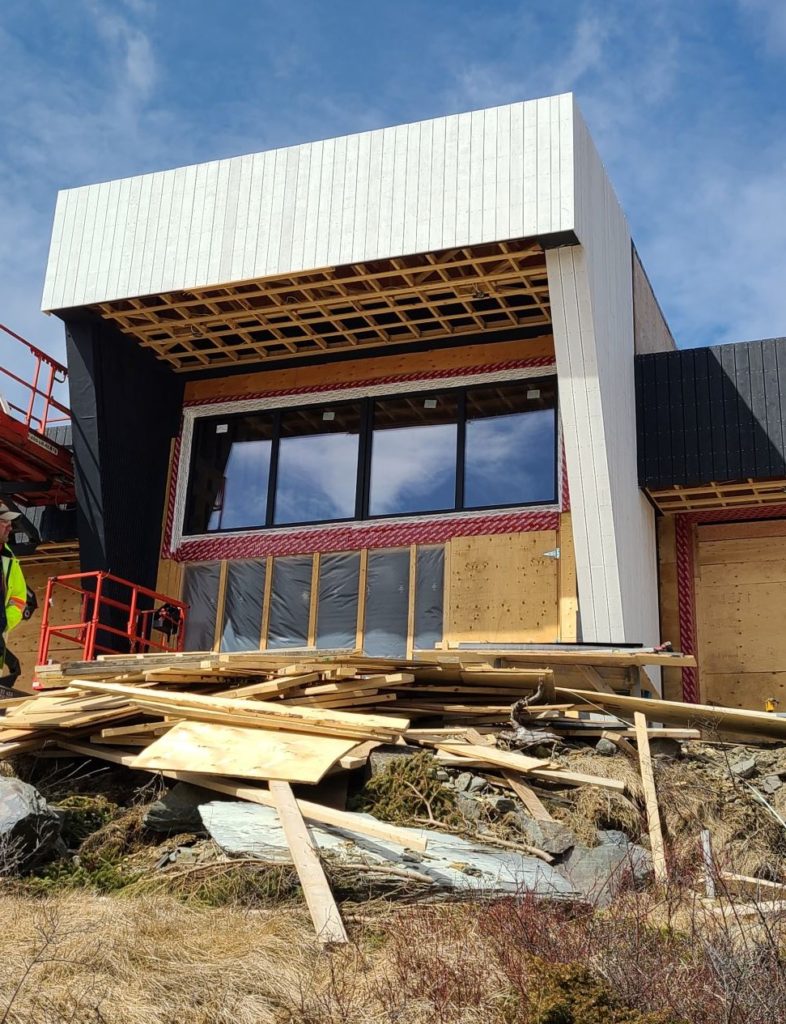
However, as Captain Smith would have it, full steam ahead with the large living room unit. It consists of two central bi-parting doors that slide over fixed glass panels at either side.
We have had to wait for a relatively calm day. There was one in April. This unit weighs almost 900 pounds without the glass. (Incidentally, all the triple glazed glass units are field installed AFTER the frames are completed.) The door frame has come in on a flatbed, mounted on a bespoke wooden support. It takes a crew of eight to move the frame off the flatbed and into place. It’s all a bit nerve wracking. Some spare rigid insulation offers a gentle track down around the side of the house. But the final product is really worth the wait – at least I think so.
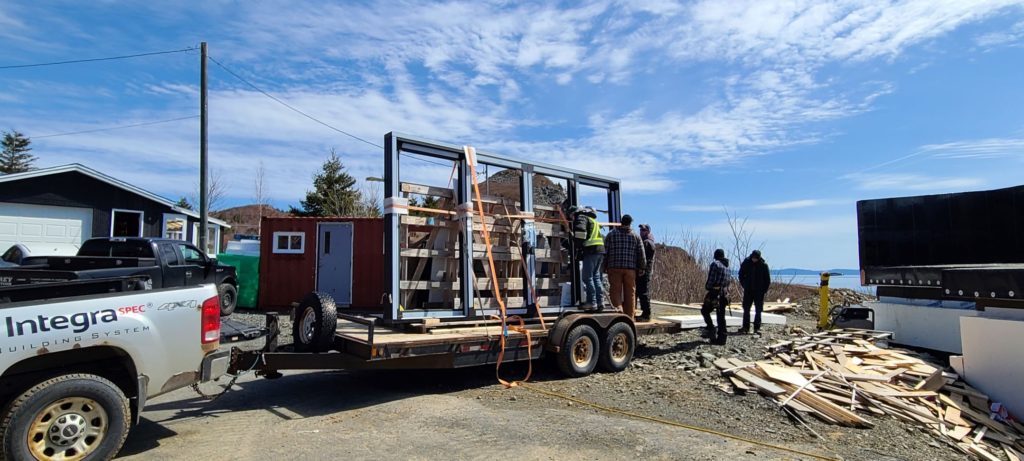
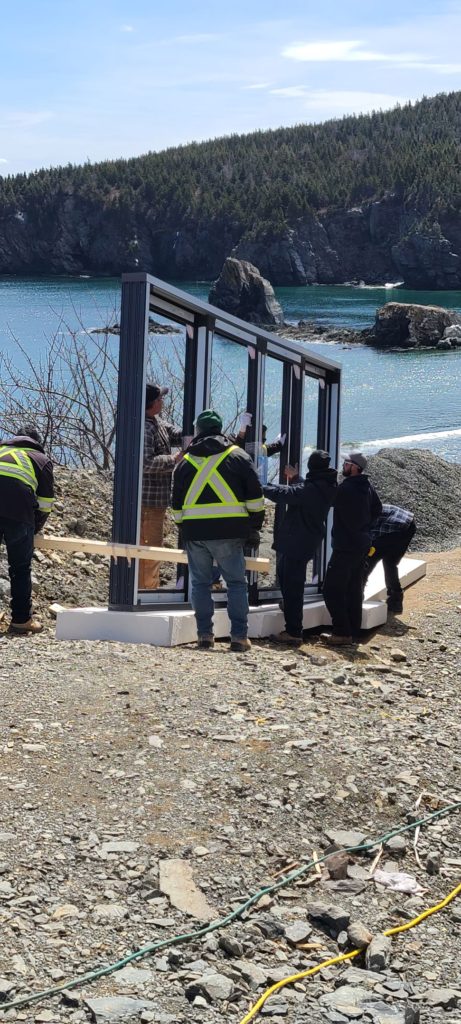
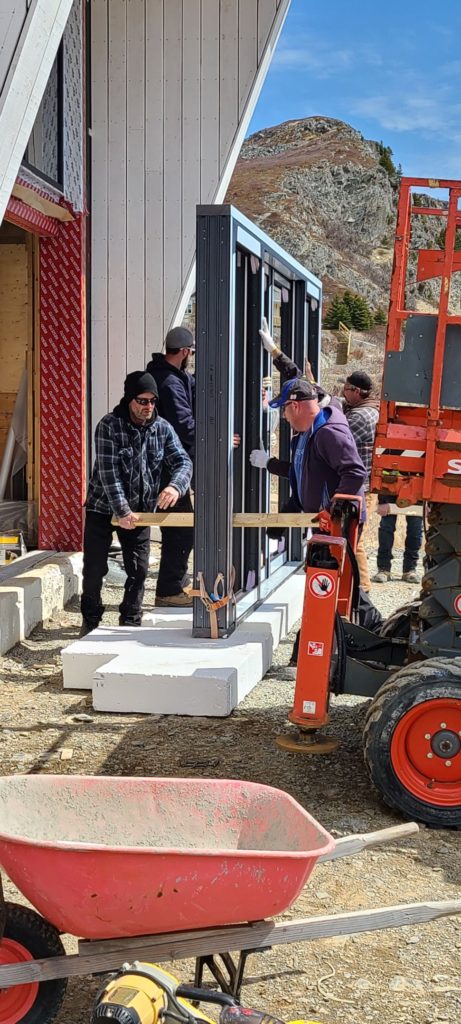
So to conclude, my advice would be to seek out the highest quality windows your budget can bear and then make sure they are meticulously installed and flashed with flexible membrane and brake-formed metal. And to reiterate, almost every house construction will be different depending on your exterior wall components. Walk this one through on paper with your architect and/or builder.
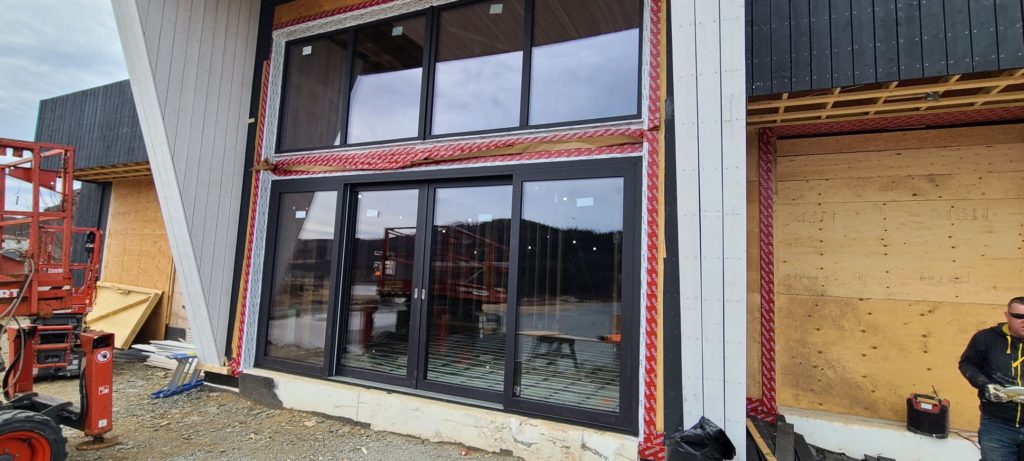
Water and air tightness are paramount. Nothing (in new construction) could be much worse than when a window – that has cost you thousands of dollars – leaks!
PS: A shameless plug – my debut novel “Ananias” is now available as an E-Book!

Very interesting Jim, it’s time new technology is brought into the province/country
Need governments and contractors to get on board!
You’re the only person I know who could make window installation so enthralling. Love the shameless plug.
Have to be shameless in this world!
That house will be priceless when it is finished. I wish you had built my house.
I appreciate the compliment Carmel!
Schuco product from Sustainable Windows? I’m also waiting for parts one year later and the supplier/contractor has left me high and dry (as well as with damage done to the interior of my home). Glad you got what you paid for and had the knowledge to hold your crew accountable to your “passive house anal retention”. They would have taken you for a ride without it I suspect. I love my windows, but I don’t have the same confidence you have in the install.
A great read Jim. I am not surprised these windows are coming from Germany. Can you share the contact info? Can’t wait to visit someday.