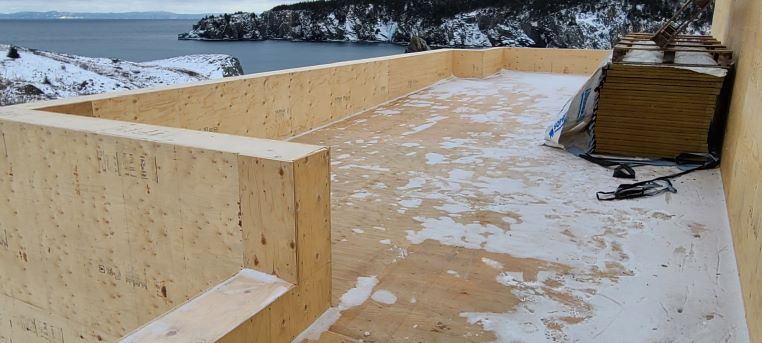
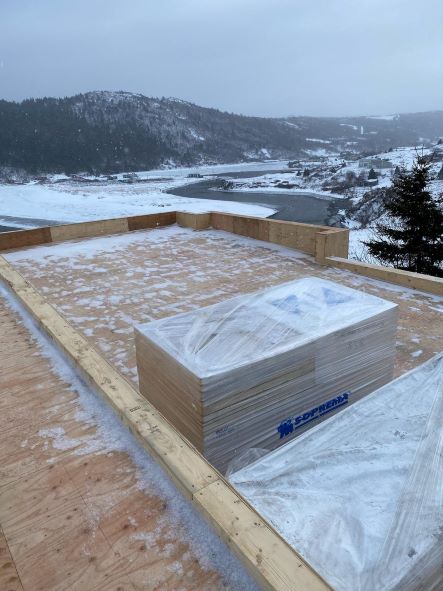
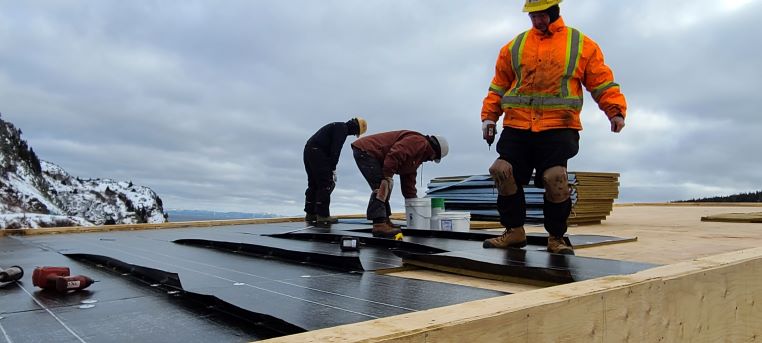
Just prior to the Christmas break, the crew was fortunate enough to get the plywood roof decks down. Progress, for January month, remained steady. The weather has been a blessing.
We had a late start last summer because my contractor had previous commitments. This wasn’t a serious problem in my view, as I knew that once he got going he would be dedicated to the project, and quite frankly, I was in no great rush. I had only one burning concern: that the roof membrane would be put on in the middle of the winter.
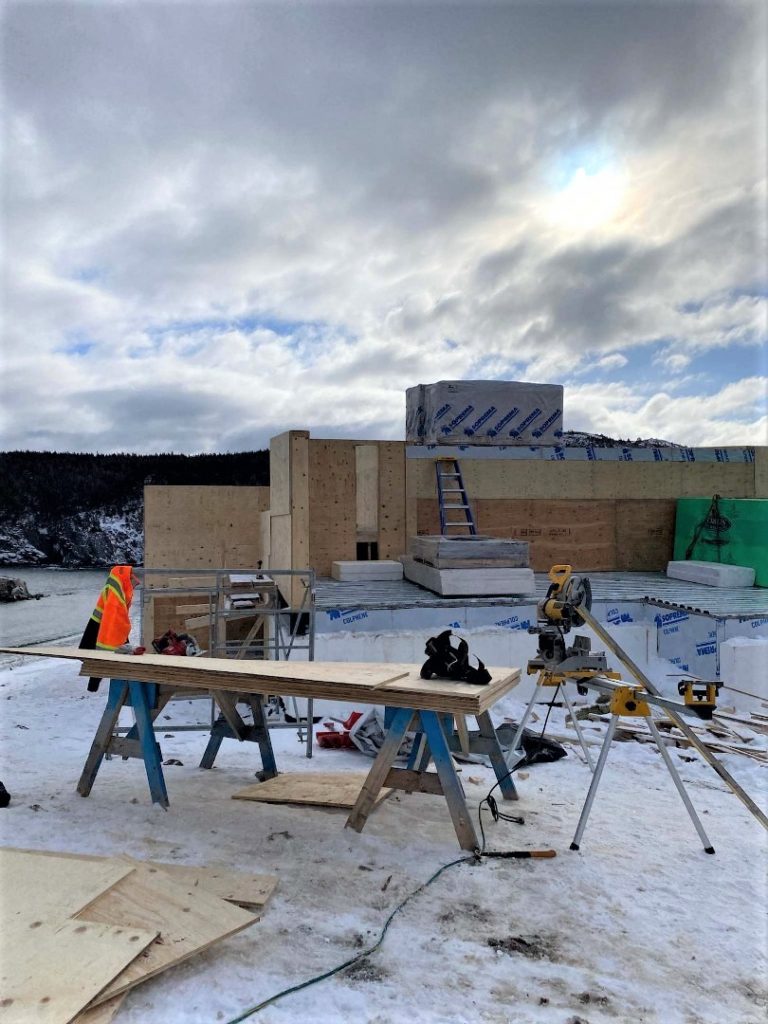
But here we were in January, and the crew were pushing to get the place watertight…
It’s important to understand the type of roof membrane I worked into the design. It’s not your typical shingled roof. Many of you will recognize the residential variant of the system, commonly referred to as “Torch On”, but that is an oversimplification. The membrane is properly called modified bitumen. The modification is a chemical one: styrene-butadiene-styrene or SBS, a synthetic rubber, is added to a common (and ancient) roofing material, bitumen (or asphalt). This co-polymer modification makes the bitumen far more flexible and durable, even in extremely cold temperatures. The bitumen is then processed into a sheet material by impregnation into a woven scrim reinforcement of fibreglass or polyester. The product is prepared in roll form, typically one metre in width.
SBS modified bitumen roofing membranes have about a forty-year history in Canada, and have undergone vast improvements over the years to become the commercial product of choice with over half of all new commercial roofs using the product/system. The market share in the US is not quite one quarter. This is due to a less severe climate and a wider range of available roofing expertise.
From an environmental perspective, virtually all roof membranes are problematic, and it will be interesting to see how this unfolds in the coming years. Fundamentally, however, an environmentally responsible choice should be towards a product that doesn’t end up in the landfill as quickly as the alternatives. A modified bitumen roof, properly designed and installed, should be serviceable for thirty to fifty years.
Now this is starting to get a bit technical and boring and I promised my readers I would not do that. But there are a few points that need to be covered.
First of all – and this isn’t the least bit technical – architects love boxes. I went to architecture school at a time when boldness of form and pureness of geometry was all the rage. The famous “less is more” adage eschewed decoration and historical bric-a-brac. We were coming out of the modernist era of steel and glass and concrete, even though some architects who pushed back against the proverbial Bauhaus School were gaining recognition.
My influences were many. Some would say L’ecole de Bozo Arts – having never been able to take architectural theory too seriously … or myself for that matter.
So boxes need flat roofs, except that well-designed roofs are never flat. They always slope to drains. Two percent grade is typically enough to drain away precipitation. We also employ parapets. These are low walls that contain the roof on all sides. Aside from capturing precipitation and funneling it to a drain, they rather conveniently convey the impression that we have created a box – even though we haven’t really done so at all. So we are in fact, cheating. And so what? It’s all about the architectural wow factor. We are aesthetic con-artists.
My sustainable house is just a bunch of boxes. You may say that’s just for aesthetics, but please let me dig into this. Bear with me. You’ll see where I’m going.
Many of you will start your dream home with an ideal steeped in Newfoundland heritage. The saltbox. The biscuit box. And that’s all very well, but these styles most often come with basements/crawl spaces and peaked (traditional) roofs. Going out on a limb here, it is my contention that these are bloody problematic. I have spent a lifetime trying to stitch together air and vapour barrier continuity in housing with these ridiculous, unoccupied and unneeded spaces. They were all well and dandy for a completely different set of reasons in the 18th and 19th centuries when there was no insulation.
But honestly, the painstaking efforts needed to achieve airtightness in traditional housing forms is completely ludicrous. Attics and crawlspaces are the bane of sensible construction. They will be the source of your problems. I’m shouting here now even though I’ve not jammed my Caps Lock.
Keep it simple. This means that if you don’t enclose spaces you don’t live in, you’ll be far better off. An insulated slab-on-grade is the bottom of the box. A “flat” roof is the top of the box and you can just spray the be-jeezus out of it with foam on the underside. Insulation, air and vapour barrier done. One shot.
The walls (over a foot thick) simply connect the lower and upper elements. No soffits. No roof vents. No scarfing in little strips of poly vapour barrier as you go along. This may be hard to grasp now, but as we progress, I hope that my point becomes clear.
Now back to the roof. Typical modified bitumen roof installations are two-ply. This builds in redundancy. Joints are staggered. Imperfections don’t result in leaks. There’s some forgiveness involved. The base sheet looks like rolled shiny bitumen on both the top and bottom side.
The cap sheet has granules on the top side to protect the bitumen from ultra-violet (UV) degradation – the same as shingles.
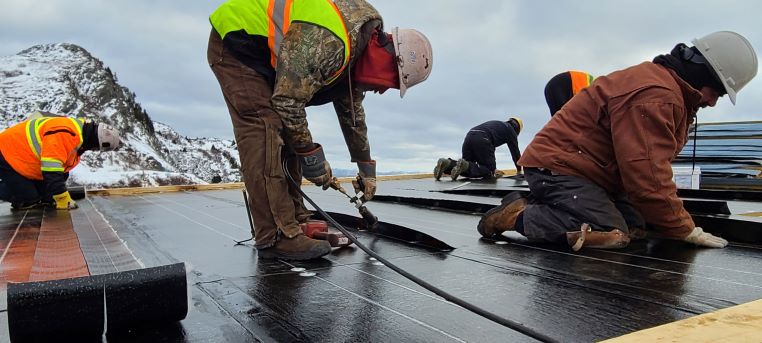
The mod-bit roofing is rolled out and melted into place with heat from propane roofing torches. The melting of the bitumen fuses the membrane into place upon cooling. Most commercial buildings don’t have wood decks, so this is not a problem (with proper cautionary measures). In the early days, we managed to burn down a few (well more than a few actually) wood frame buildings by torching mod-bit membranes onto wood decks. This is no longer the practice.
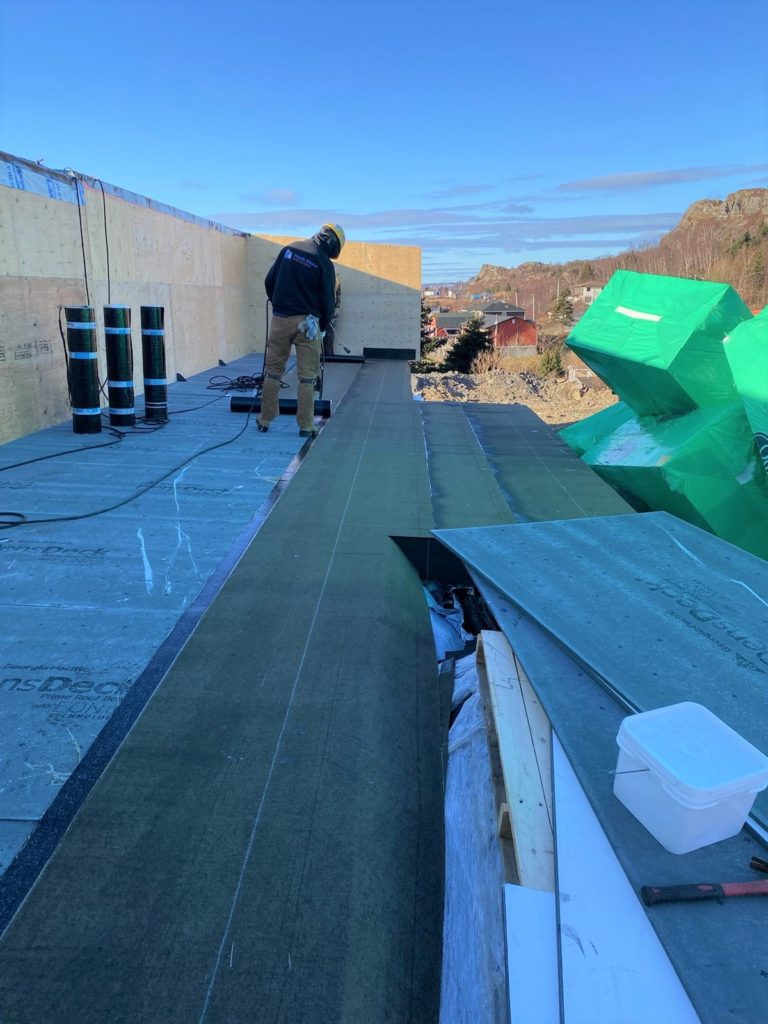
These days, the base sheet of the two-ply system (for installation on wood decks) comes factory attached to non-combustible insulation. There is a three inch selvedge edge on each “tile” that allows for positive overlap onto the previous tile. The three-foot by eight-foot tiles look like this:
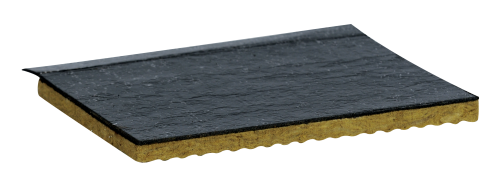
Aside from preventing wood deck exposure to “hot work”, this method adds insulation value and allows the membrane freedom of thermal movement that would not be realized if the base sheet was fused directly to the deck. The tiles are placed side-by-side in successive courses. The top edge and sides are screwed to the deck with large washers. The selvedge edge of the next course is heat welded by torch flame onto the top edge of the previous course, creating a watertight membrane while burying the screws and washers into the installation. Side joints are typically covered with an eight-inch-wide strip of base sheet material which is also “torched on”. Flashings, or strips of base sheet required to waterproof the intersection of the horizontal base with vertical walls and/or parapets, are glued in place with a roofing adhesive. This also circumvents any torch flame on combustible wood back-up. Once the flashings are complete, the roof should be watertight.
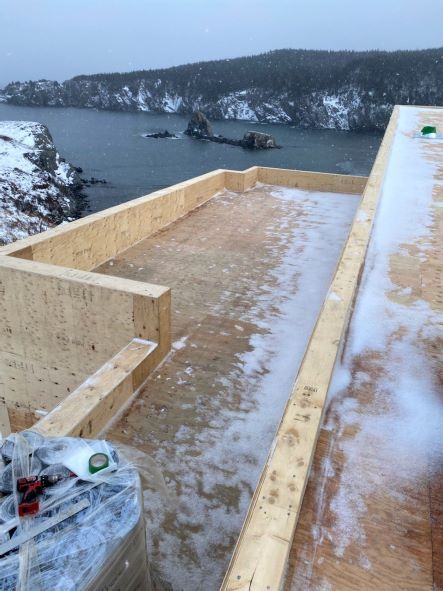
At some locations, additional thicknesses of sloped, non-combustible, rigid insulation will be added to ensure a positive slope to drains. I have chosen not to employ internal drains, but to direct water “overboard” by means of a scupper (which will ultimately be connected to a downspout – see photo below). These require that the roof surface in the immediate vicinity be purposely sloped.
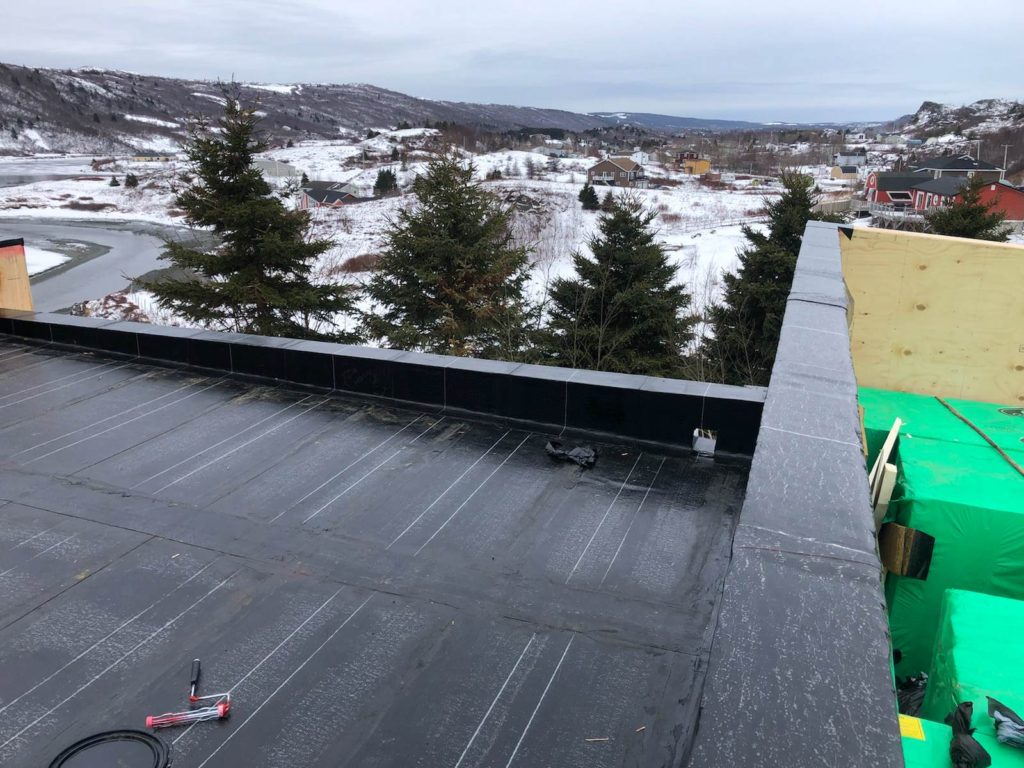
The decision I have made with the contractor and the roofing crew is to hold off torching on the second layer or cap sheet until the spring. This will allow us to progress construction on the exterior wall finishes and make sure that the base sheet is completely watertight. When the warmer weather arrives, the base sheet can be inspected for any deficiencies that might have occurred as a result of cold weather application conditions. Only then will the cap sheet be installed – 100% redundancy. The base sheet can be temporarily exposed for a period not exceeding six months. Remember, it has no protection from UV exposure.
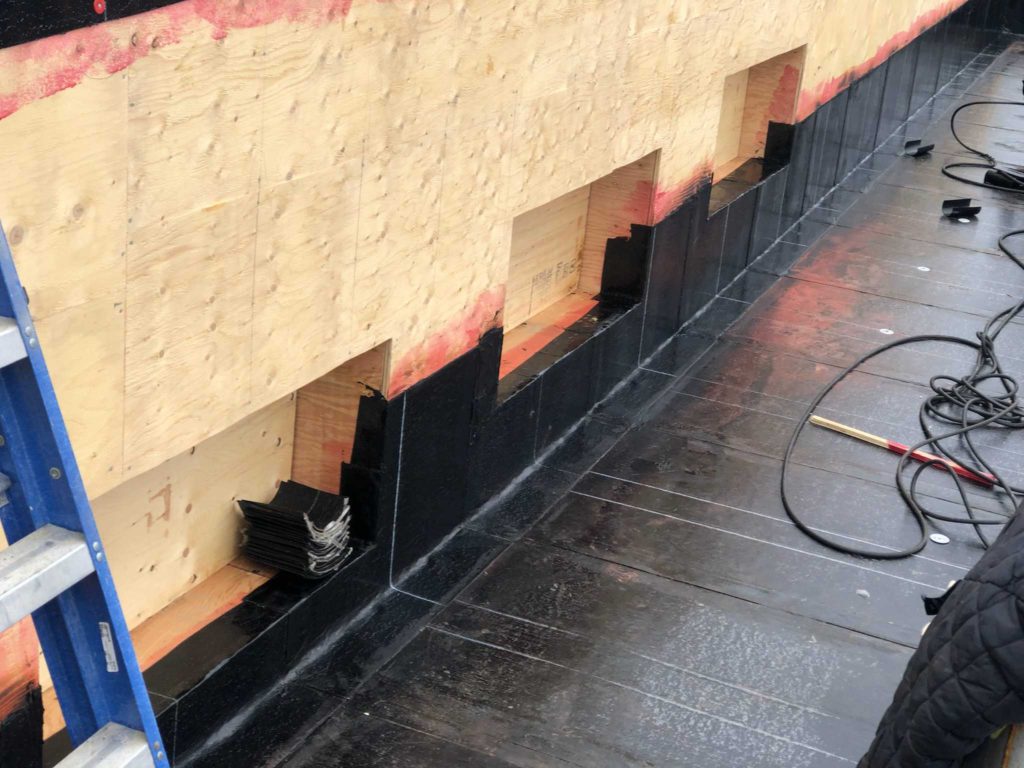
The photo above shows great care and attention to flashing around the clerestory windows. It is important to note that the roof will be insulated beneath the deck when the envelope is fully enclosed and temporary interior heat has been introduced. This will be a foamed-in-place urethane. We are done for now.
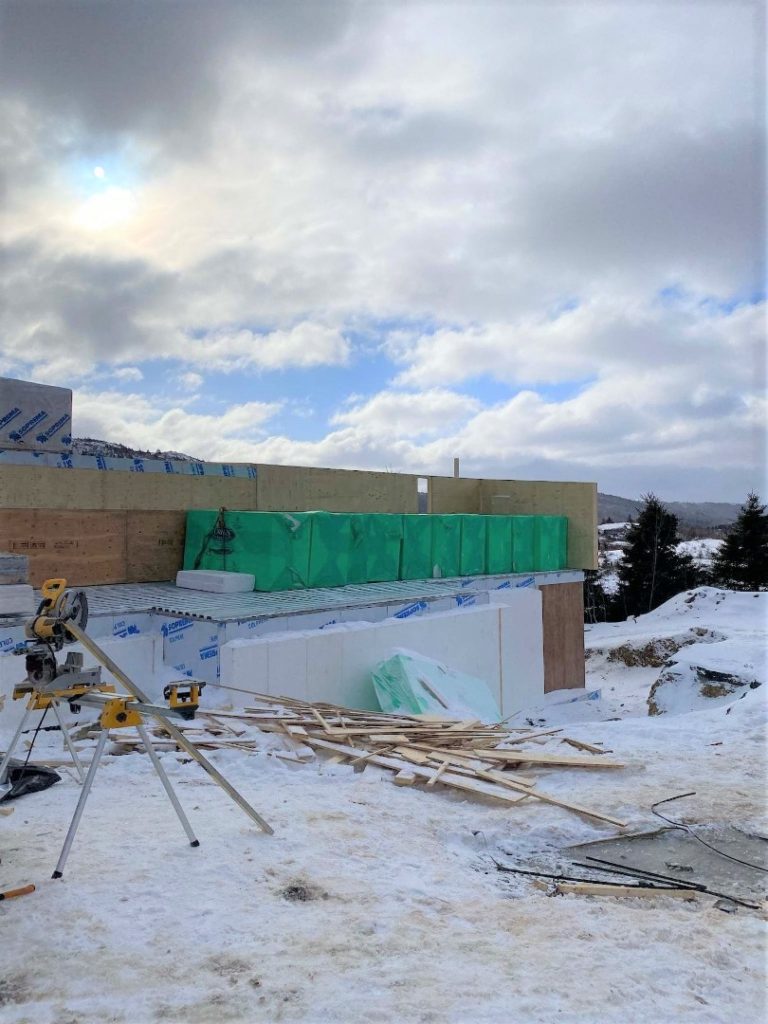
Except for one thing – and I hope I haven’t lost you yet. As you may recall, about two fifths of this house will be buried into the existing hill. The roofing for this portion of the structure is a different beast.
The interior spaces of the buried portion of the house are largely utility plus a mud / laundry room and an artist’s studio. There will be no ceiling. The corrugated steel deck, beams, conduit and ductwork will be exposed and sprayed with a “dry fog” paint system. In other words, it will look like your local Sobeys or Dominion.
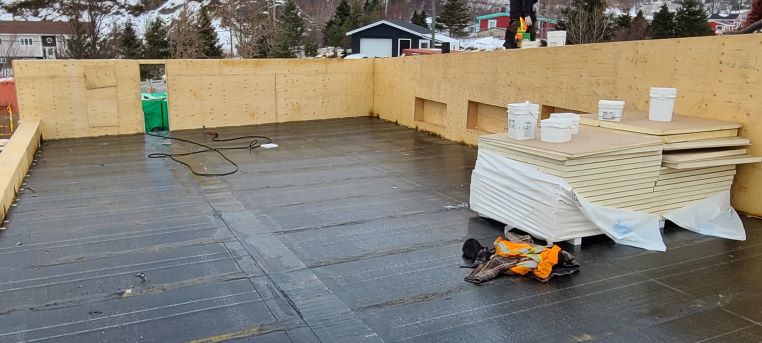
Here, the insulation sits on top of the deck. I don’t want any screws (visually unappealing and thermal bridging) so I have introduced the roofers to a fully glued-down system. An exterior grade gypsum board is glued onto the deck first. This provides a flat working surface. This is followed by a light gauge layer of modified bitumen that will act as a vapour barrier (keeping moist interior air out of the roof assembly).
Next, a layer of eight-inch-thick rigid expanded polystyrene insulation (EPS) is glued down, followed by a second layer of eight-inch EPS. The joints are staggered to ensure thermal continuity. The EPS we are using has an R-value of 4.26 per inch, so that’s a total of just over 68 – slightly less than the main living spaces. When we add in other system components (plus the 12-inch minimum of topsoil) we are approaching R-70.

Non-flammable protection board is glued down over the rigid insulation so that the base sheet of modified bitumen can be torched on. Again, having achieved an initial watertight enclosure, we are going to wait until the warm weather to install the mod-bit cap sheet. There are a variety of other layers to produce what is commonly called a “green roof”. More on this later.

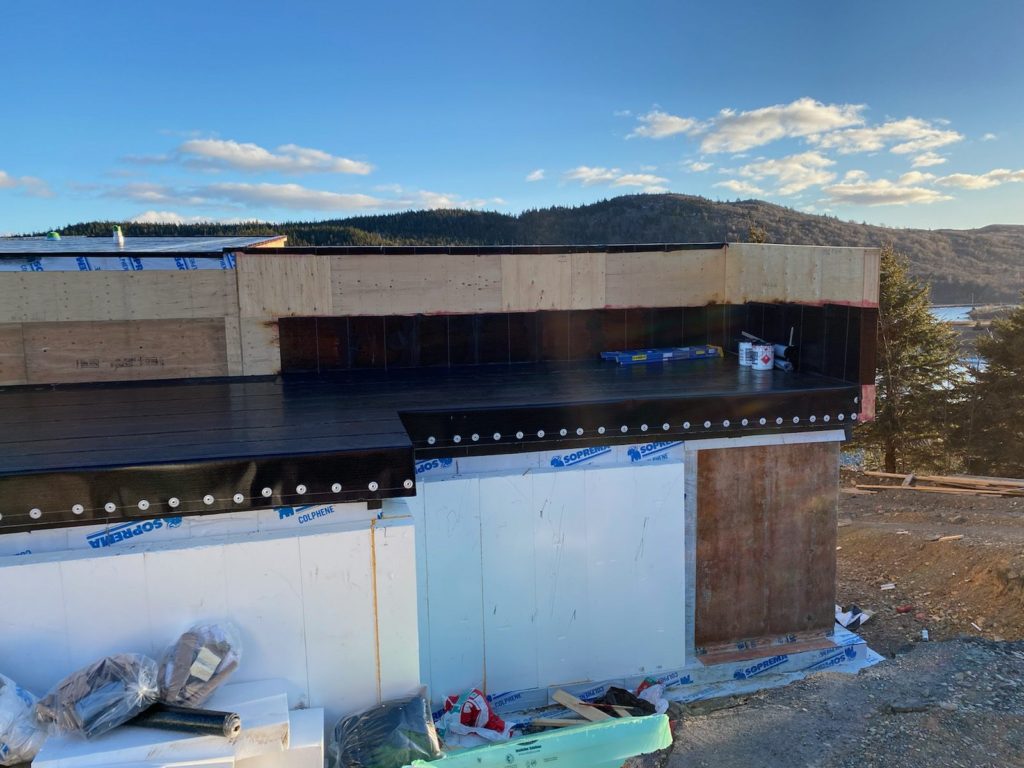
Note that this portion of roof slopes to the outside edge with no drains or parapets. The water will be run into the ground and eventually find its way to the weeping tile at the base of the foundation. The edge of the roof has been turned down and temporarily secured with screws and washers, awaiting the completion of the EPS insulation on the walls together with backfill and eventually, topsoil and grass.
Kudos to those of you who have stuck with me on this. Feel free to respond with questions.
To recap, I have tried to introduce some thoughts for debate, primarily the notion that the “box” is easiest to effectively insulate and make air-tight. The roofing discussion seemed to be a great opportunity to throw this out there.
I am really enjoying reading about your progress and even though a lot of the technical stuff escapes me, I find it interesting. I like that you are plodding ahead with ideas that are mostly unheard of or not practised in our new house builds.
It is going to be spectacular!
Thanks for sticking with it. There are technical topics that I have to cover, but I try to approach them in a way that makes it interesting for everyone. I contend that these are things that people OUTSIDE the industry need to know to get them on an equal footing with designers, contractors and vendors.
Interesting descriptions, Jim. Regarding roof shapes, if a flat roof is doable, and the attic space is not needed (our Christmas decorations and other things live there), then why hasn’t the flat roof caught on? Is it inertia? Tradition? Regarding basements, they can leak but they also make best use of the building footprint, getting more floor space without making the house bigger in exterior size.
I think the reasons why it has not caught on may be numerous. In the 50s and 60s many houses had flat or low slope roofs. But the 3 and 4 ply “pitch and gravel” roofs of the era failed and were expensive to replace. Plus, you can shingle a roof with fairly unskilled labour – I should know … having done many myself. (In fact I’ve done two in the last three years!) As for basements, yes more area, but typically the source of 30% of your heat loss. I understand that doing without them is not for everyone. But it’s not “free” space. I am trying to explain that we should not be shy of the alternative. I am personally convinced that we can simplify “standard” construction if we wish to make it more efficient and less complex to build. But overall Ken, your points are well taken!
I would hasten to add that a slab-on-grade provides the best opportunity for heated floors (which are wonderful). But more importantly, in an energy efficient house with southern exposure, a slab-on-grade also gives you thermal mass – the ability to store the sun’s radiation and release it back slowly in the evening. And with no moving parts!
Well, I have to say, Jim – I’m a fan of simplicity when it leads to less expensive or more durable construction. We have a crisis of people going without suitable housing, so every advantage helps.
Interesting stuff Jim. This type of roofing is obviously suited to new construction. However, I wonder if this kind of thing could be retrofit onto an existing shingle sloped roof? What might be the issues?
Hi Brian! Thanks for stopping by! Without knowing the details of the particular retrofit it would be difficult to say. If it was a low slope, modified bitumen would definitely be a consideration. Shingles just don’t hold up on low slopes. Given that it is likely above an attic space, the use of X-Press board (with insulation) wouldn’t add any insulation value. However you could screw down a double layer of 3mm non-combustible protection board (to avoid any open joints) and then go over with a two-ply system. Your roofer may suggest that a cap sheet is all you need – depending on the slope / ability to drain. For a normal to steep slope I think shingles remain the best alternative, however, ALWAYS use a peel and stick membrane over the entire roof surface before shingling. This will add years of additional life in my view. Shingles should never be nailed to bare deck.
Very interesting Jim, and the fact you found a contractor to go along with your design, hats off to you. You’ll have spectacular property, the envy of the cove.
Finding a contractor who will share in his/her knowledge to be fully part of a team may be the key to success.
I’m just catching up on your progress and enjoying seeing your design and execution. I’ve been designing in my head for years and will hopefully be pulling the trigger soon. Sustainable and low energy use is key. Not sure I’ll reach passive standards. I see many concepts in your design I am evaluating myself so it’s nice to see them in application locally. Congrats also on what appears to be a good and engaged builder.
Thanks Jason! Good luck with your home project. Let me know if you have a specific question.
Hello Jim. I’m enjoying your blog and seeing the progress of your home! We are in the process of building a small slab on grade house in Maddox Cove, almost to passive house standards (apologies in advance, it is a little saltbox – but we are using the attic for storage if that helps any :-)). Could you tell me specifically what rigid insulation you used for your walls, back roof and under your slab? We’d like to use NL Styro and are wondering which of their products you used for which application. Thanks!
Hi Shelley! There is hope if you don’t have a cold attic! I would suggest you keep the space inside the thermal envelope instead of outside. No one will know you broke with tradition! LOL. The styrofoam product that I used is a Type 3 Expanded Polystyrene or EPS. And YES it all came from Bishops Falls. The Type 3 is not absolutely critical and is slightly more expensive than the regular stuff (Type 2). However I would recommend Type 3 for foundations as it is practically indestructible. It has amazing compressive strength and therefore is good everywhere as the EPS does tend to take a beating during the construction process.
Thanks Jim. So, insulate the roof of the attic instead of the floor, correct? Do you have any thoughts about the Trufit EPS – it’s meant to be a little compressible to fit tight between cavities. Cheers!
The Truefit works well for installation between joists and studs but remember that these elements still represent thermal bridging across the wall cavity or roof, so you need to deal with that on the interior or exterior with a continuous layer of insulation. The product is also about 20% less thermally efficient than the Type 3 so you will need more.
Yes, I was thinking to put rigid inside or outside as well . Our roof trusses are 16″ OC (there’s a lotta wind here in Maddox Cove!), How many inches of rigid do you think we’d need, in combination with the trust between trusses? Put another way, how much R-value would I still need to achieve in addition to the between-truss insulation? Or maybe just put ~ 15″ of rigid and leave out the insulation between trusses?
Sorry Shelley. I really shouldn’t speculate without knowing the details of your construction.
Hi Jim,
Of course! I’m sure our designer will know. Cheers, Shelley